4. Org Wide Settings
Last updated: June 11, 2026
Organizing Your Referrals (Org-Wide Settings)
As a Superadmin, you can set preferences in exacare that will apply across the organization for all facilities.
Overview of settings covered:
Lost referral clean-up
Efax inbox
Staff Groups
IP Whitelist Management
MFA / 2FA
Admission Alert
Finding Org Wide Settings
Click the Admin Hub tool in your navigation bar.
Select Org Wide Settings.
Lost referral clean-up
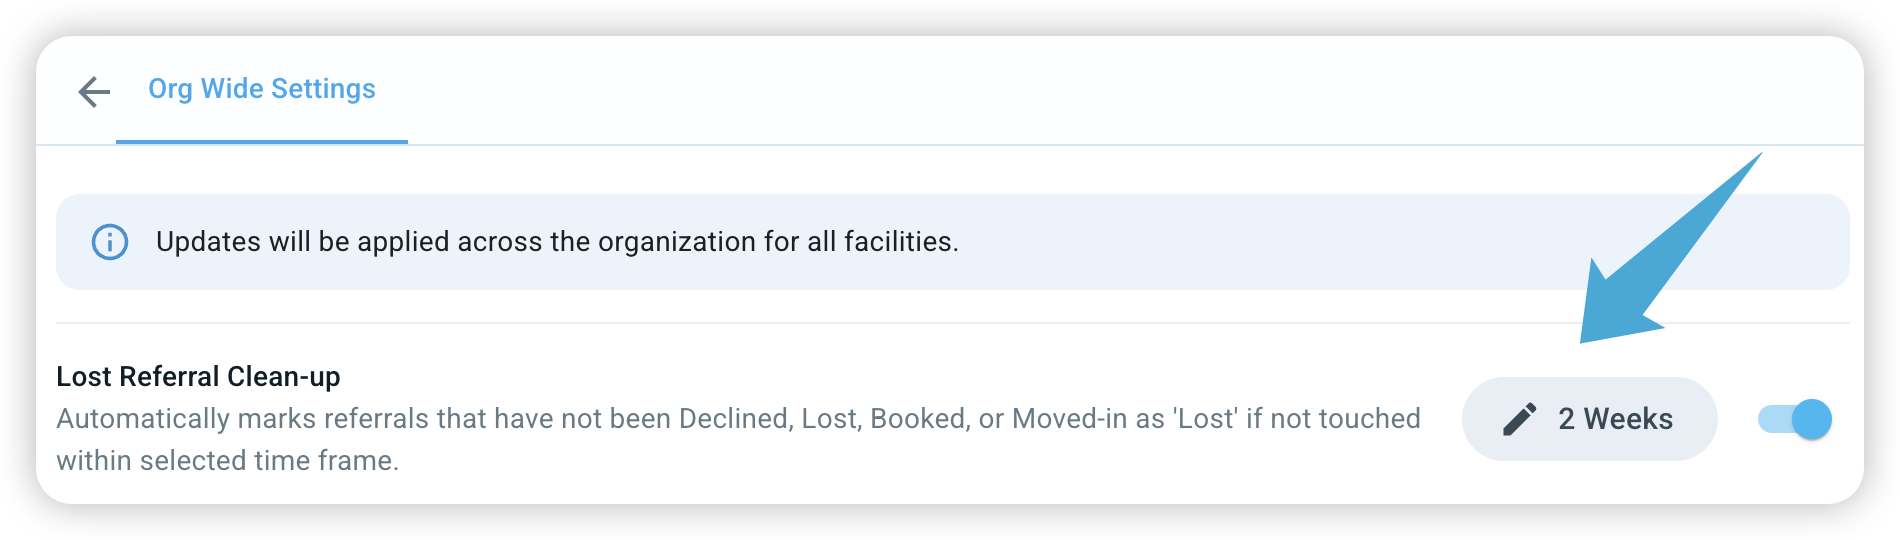
The lost referral clean-up automatically marks referrals that have not been Declined, Lost, Booked, or Moved-in as 'Lost' if not touched within selected time frame. This helps cleanup your team's workspace.
Locate Lost Referral Cleanup.
Set a Timeframe: Choose how many weeks a referral can sit "untouched" before it is automatically marked as Lost.
For example, setting this to 2 weeks means any referral that hasn't been updated or moved in 14 days will be automatically categorized as 'Lost'.
eFax Inbox
The eFax Inbox gives you visibility into every fax your facility receives through exacare, whether it created a referral or not. You can download any successfully received fax, see error states for failed transmissions, and quickly navigate to corresponding referrals. With intelligent spam detection, you can also reduce noise in your Screener by preventing non-referral documents from creating unwanted leads.
Note: Your organization must have an eFax integration enabled to view/use this feature.
How to Use the eFax Inbox
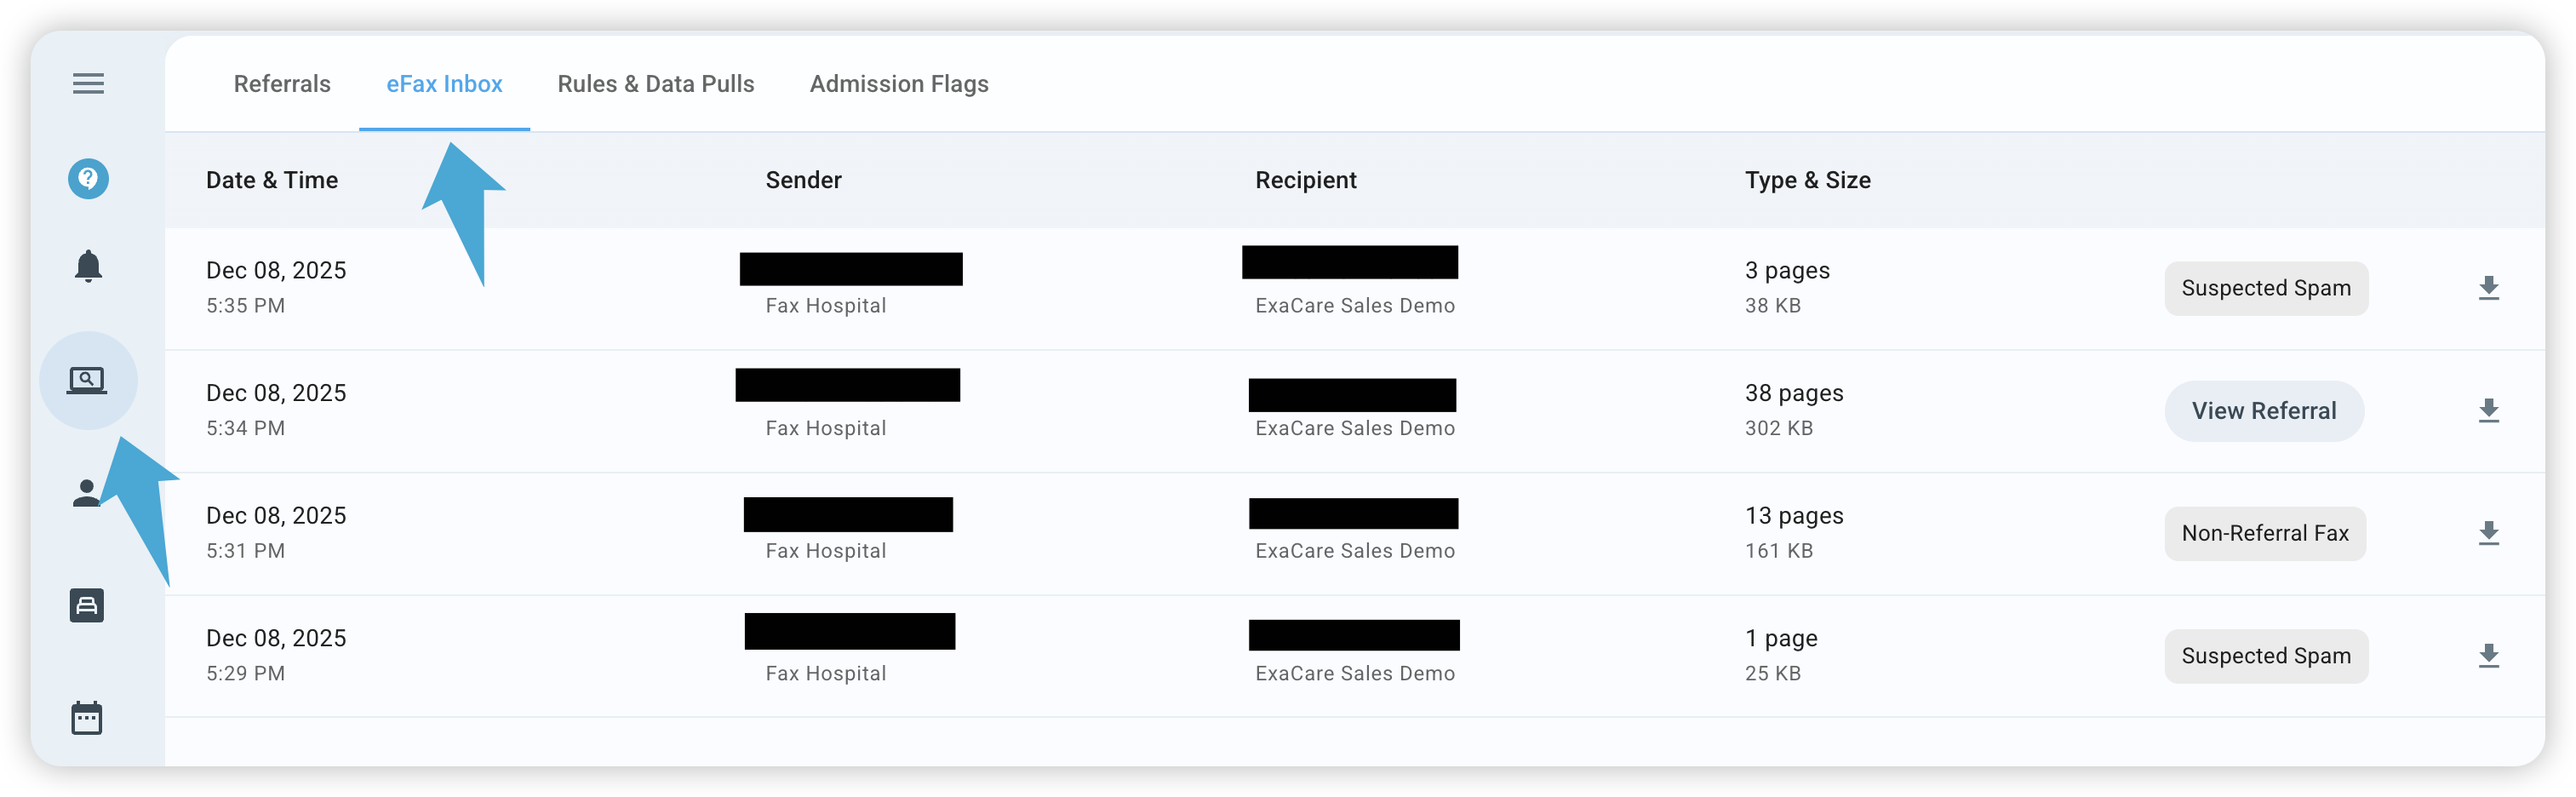
Faxes arrive and are classified into a category.
Use this view to filter through through all your eFax referrals:
Select the 'Download' button on the righthand side to download the fax.
If a referral is linked to the fax, click 'View Referral' to navigate to it.
View the status of other faxes (E.g., Deleted, Suspected Spam, Non-Referral Fax) on the right.
Note: Referrals will still be created in the Screener tab by default. The eFax inbox just adds visibility into your eFaxes.
Staff Groups
Staff Groups are designed to save you time. By grouping staff members together, you can "Tag" the group in comments or referrals. Every member of that group will receive a notification instantly.
How to Create a Staff Group
Click the Admin Hub tool in your navigation bar.
Select Org Wide Settings.
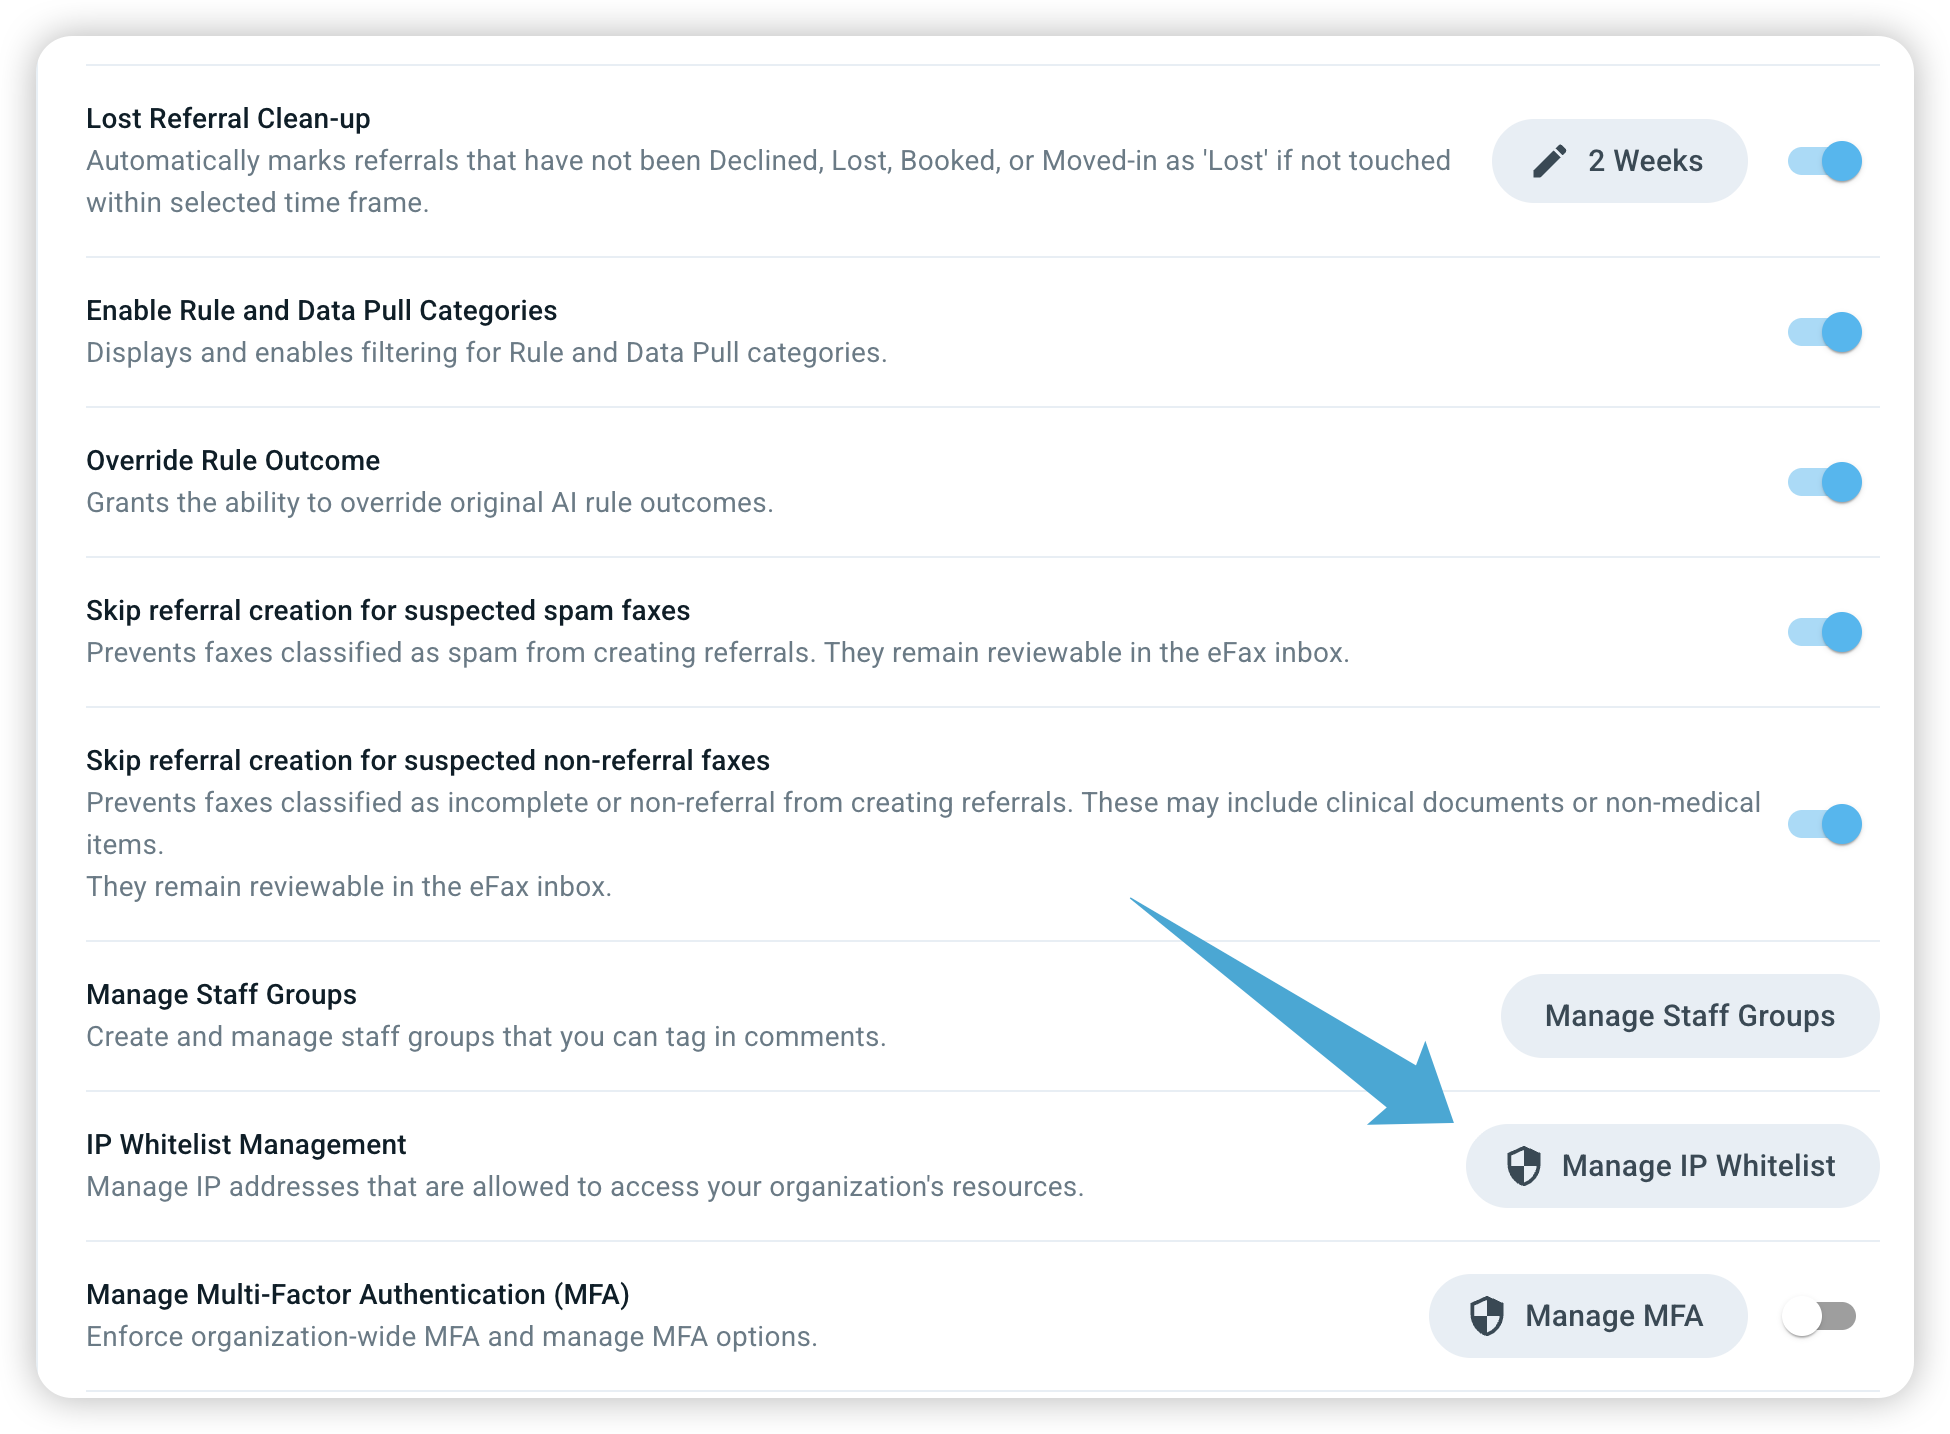
Select 'Manage Staff Groups'.
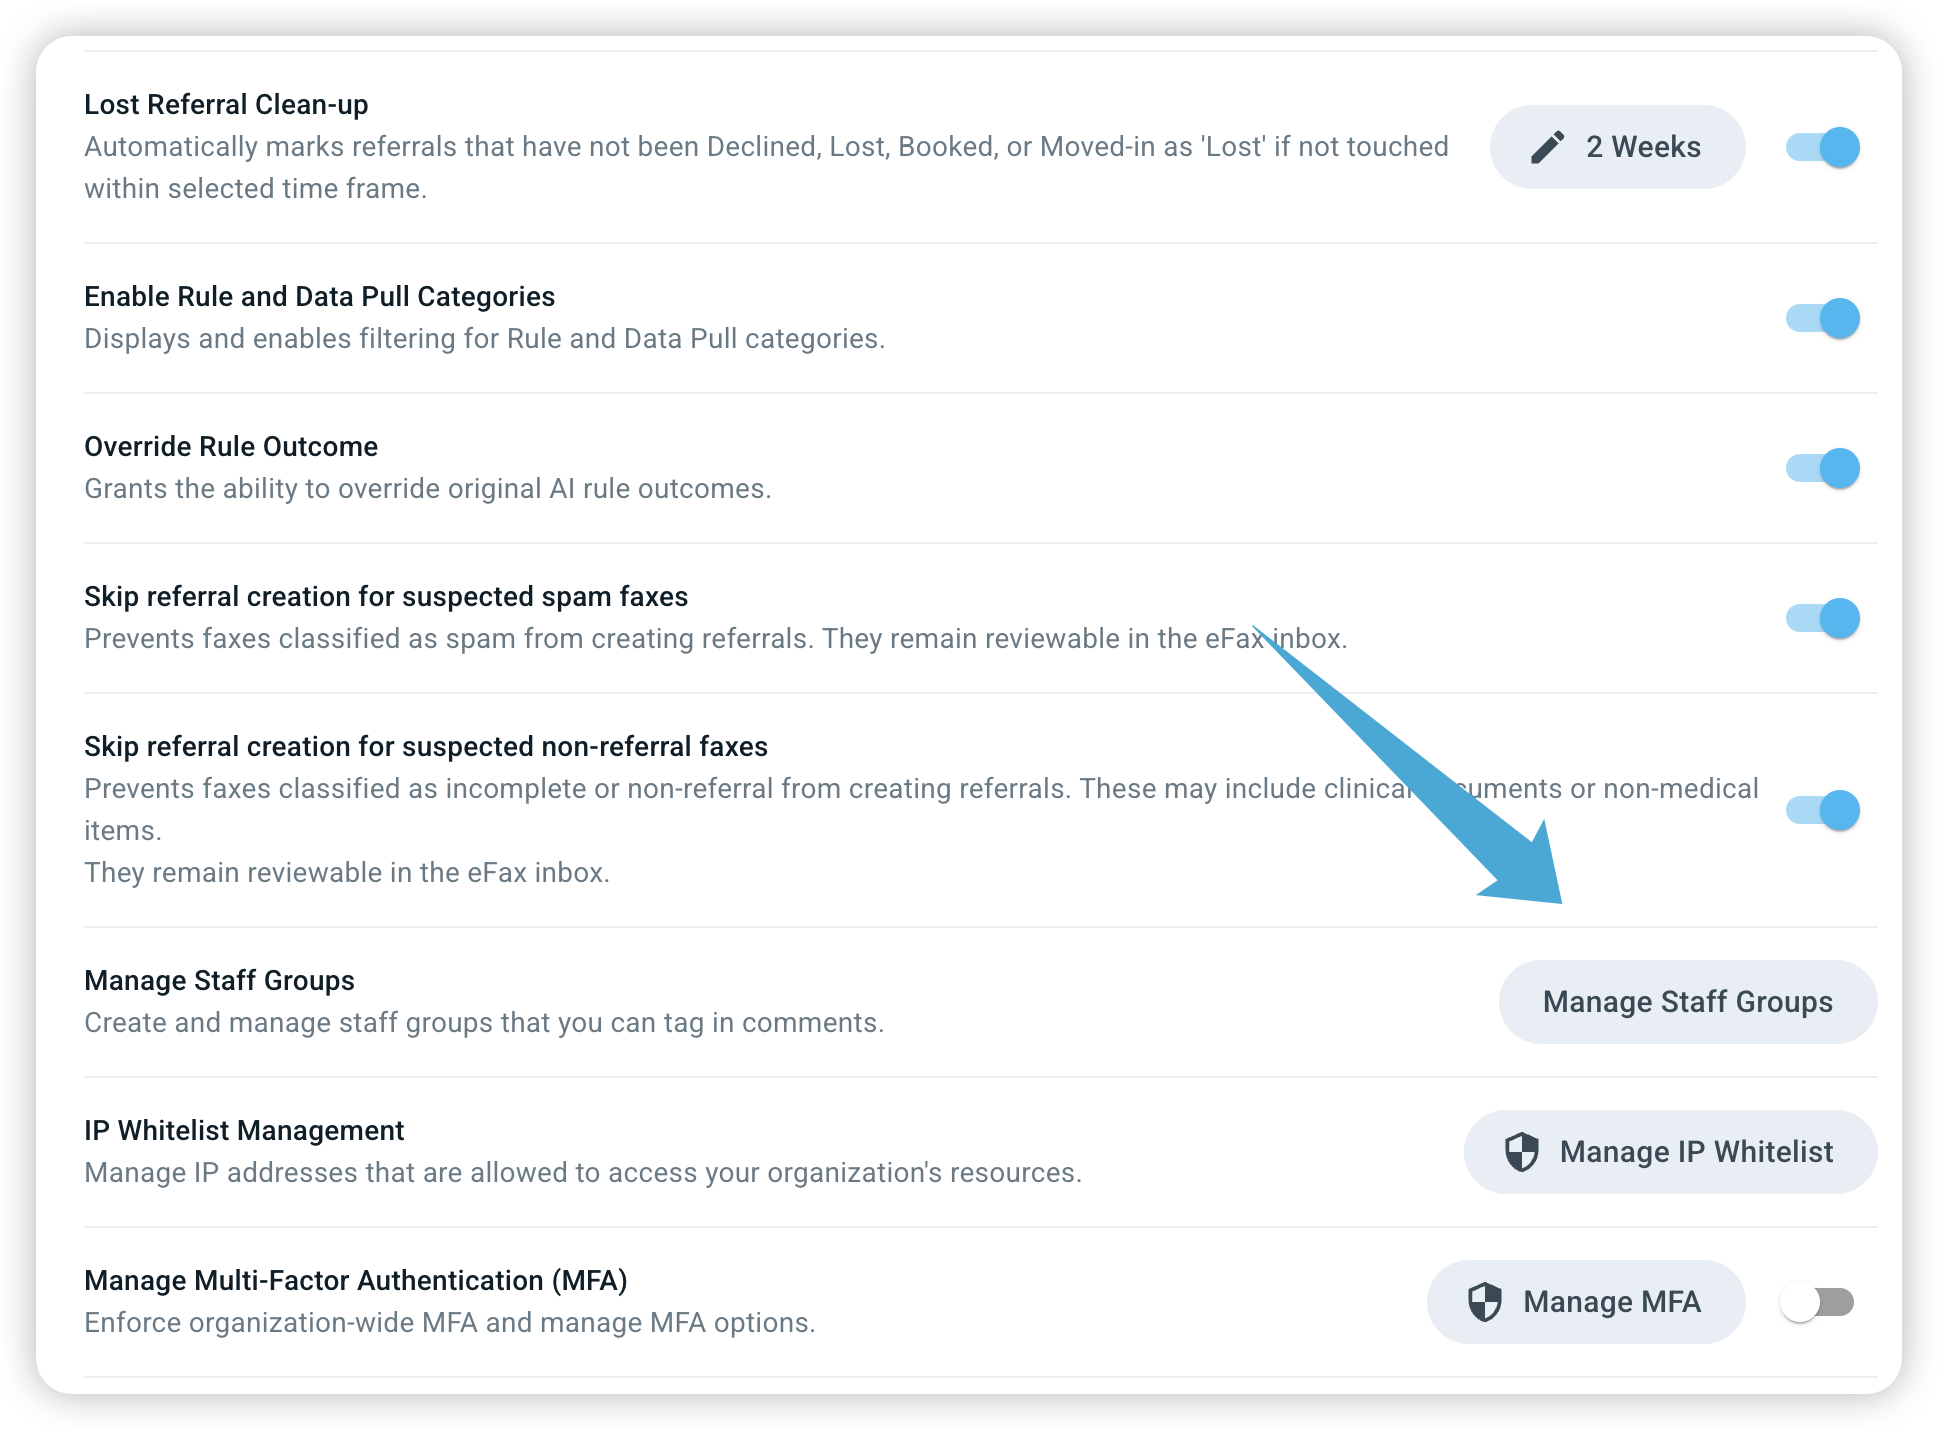
Scroll to the bottom of the page and click the 'Create Staff Group' button.
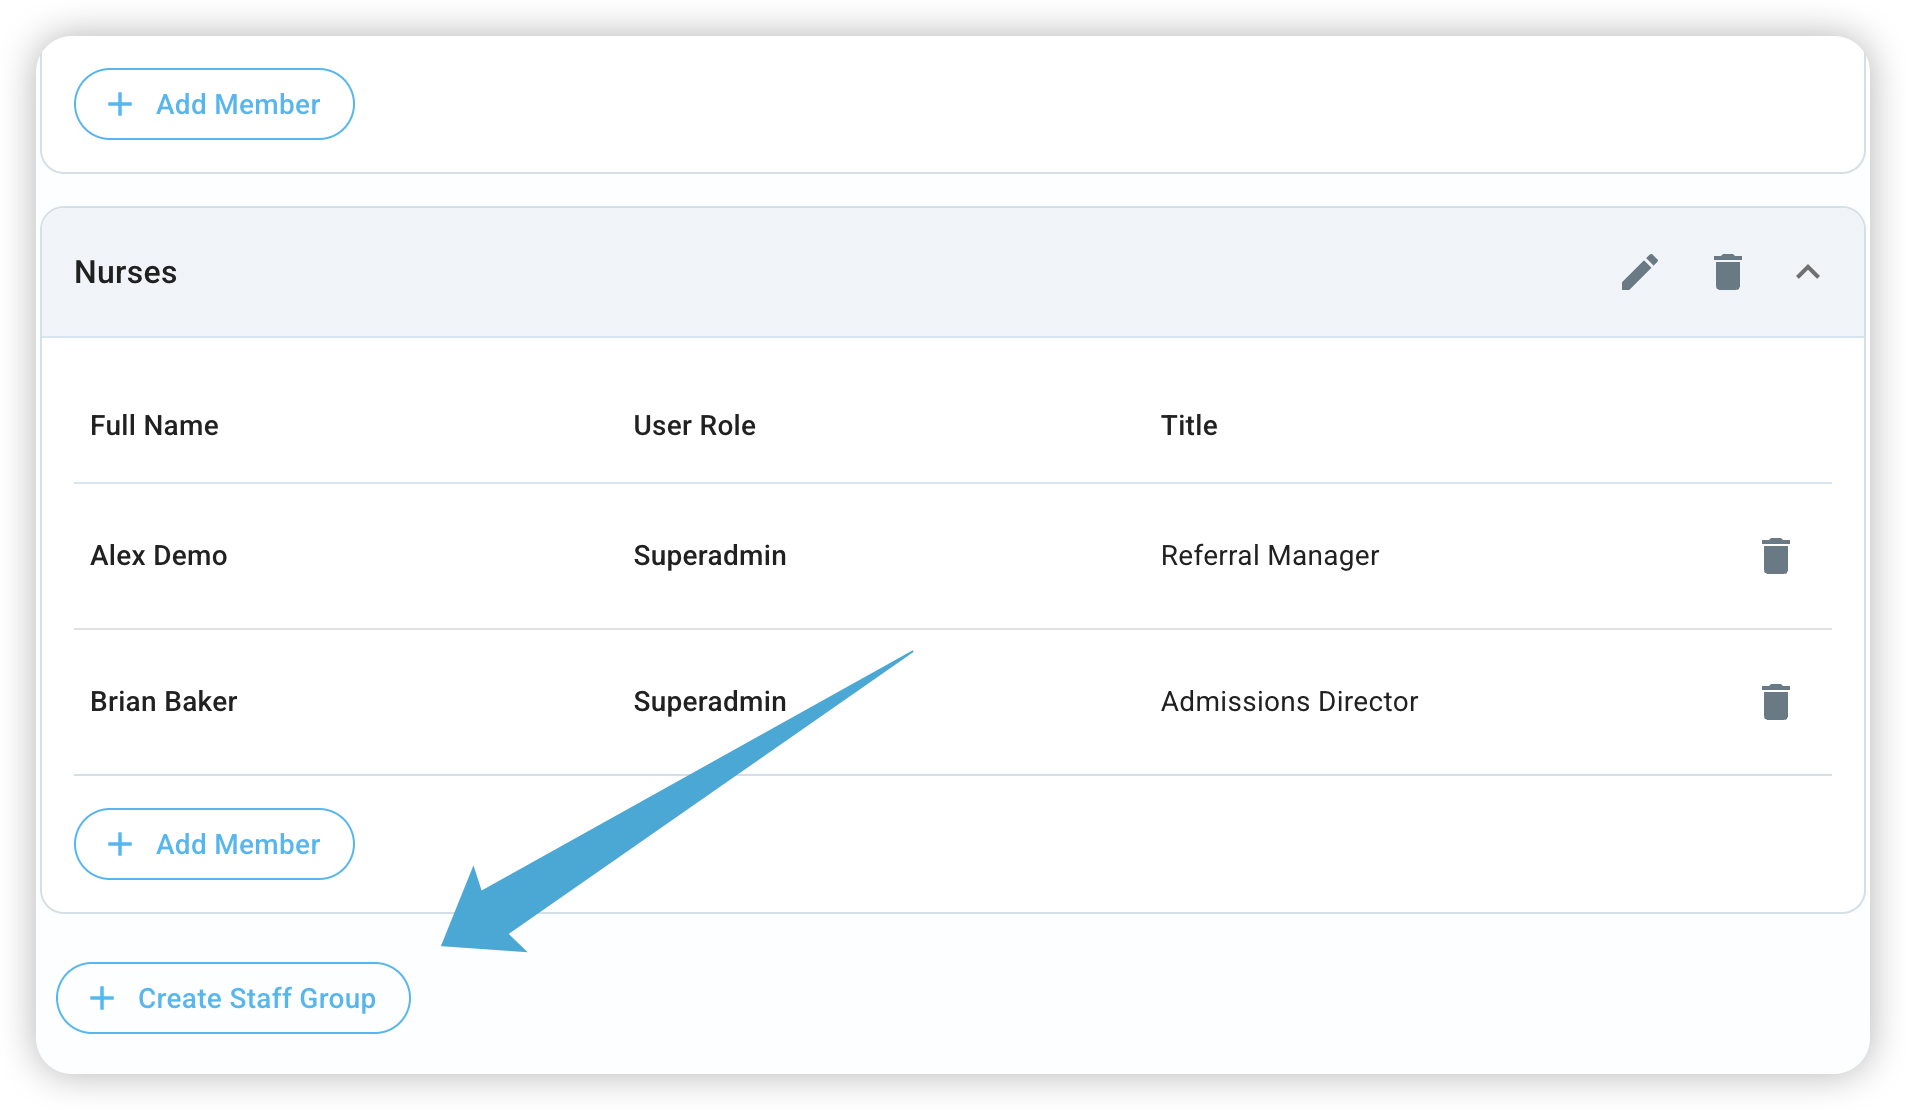
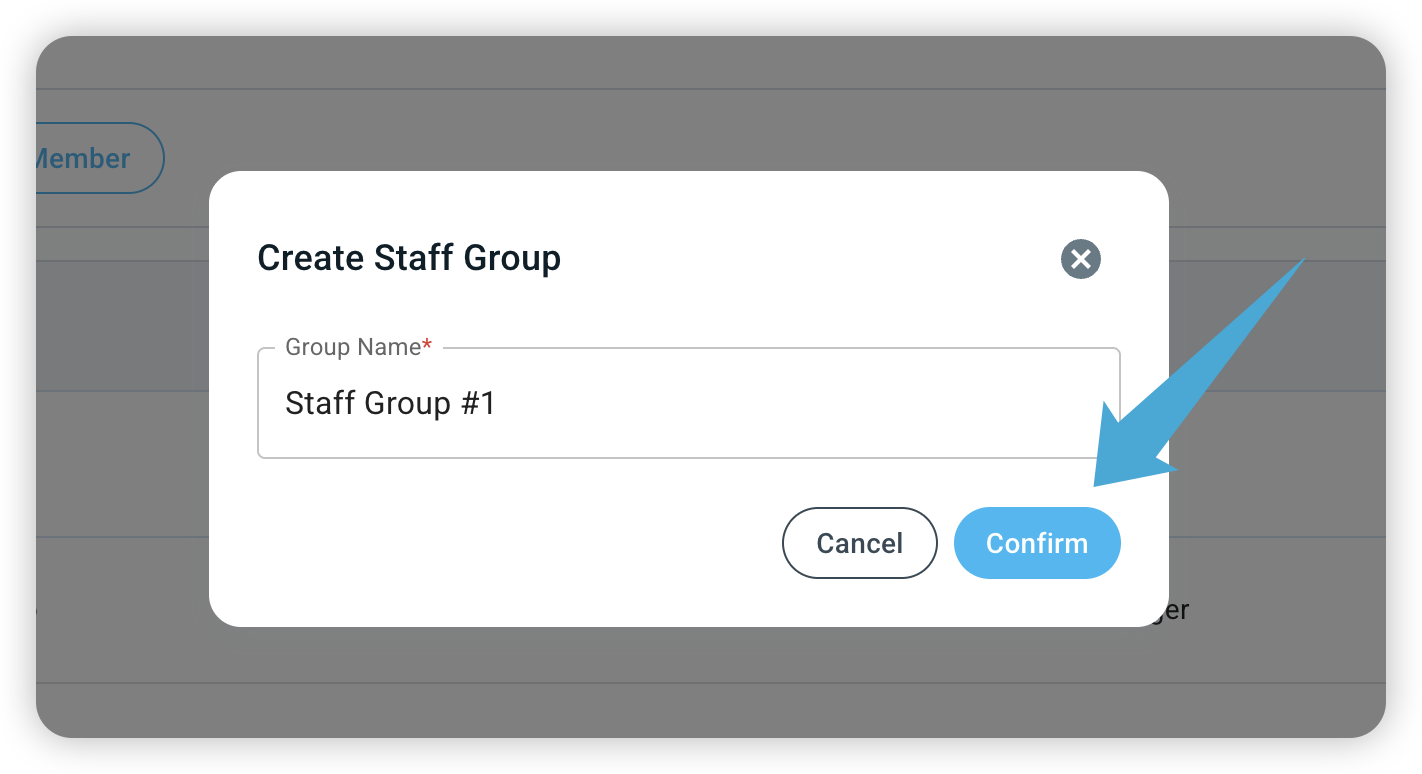
Name your group: Give it a clear name (for example, "Morning Shift" or "Clinical Team").
Add members: Search for and select the staff members you want to include in this group.
Click 'Confirm'.
How to Tag a Group in a Referral
Once your group is created, you can start using it immediately to communicate within the platform:
Navigate to a patient or referral (for example, go to the Screener and select a referral).
Click on the Activity tab.
In the comment box, type the @ symbol followed by your group name.
Type your message and click 'Publish.'
Every person assigned to that Staff Group will receive a notification, so they can jump in and help right away.
Quick Tip: You can add or remove members from a group at any time by returning to the Manage Staff Groups section. This is helpful for keeping your teams up to date as staff schedules change!
IP Whitelist Management
IP whitelisting in exacare is a security feature that restricts access to your organization's account based on IP addresses. With this feature turned on, users can only access exacare from approved network locations.
Managing IP Whitelists
Adding New IP Addresses:
Click the Admin Hub tool in your navigation bar.
Select Org Wide Settings.
Select 'Manage IP Whitelist'
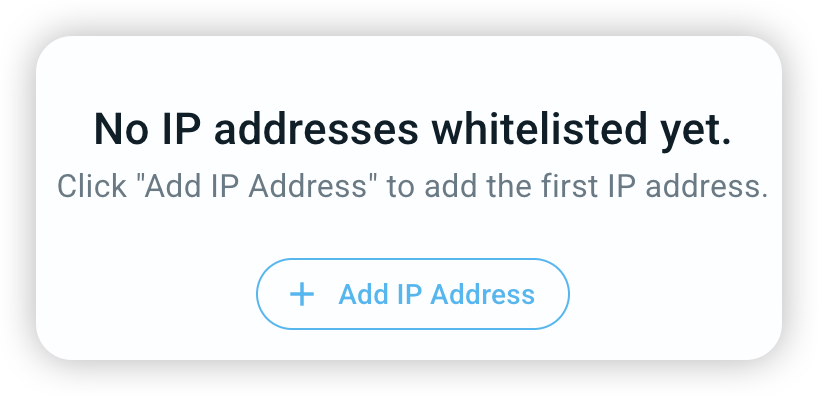
Select '+ Add IP Address'
Multi-Factor Authentication
Multi-Factor Authentication (MFA) adds an extra layer of security to your exacare account by requiring a second verification step at login (for example, an authenticator app code or a verification email), in addition to your password.
Activating MFA for your organization (Superadmin permission level)
Only users with Superadmin permissions can change this setting.
Log in to exacare.
Go to the Admin Hub.
Open the Org Wide Settings page. You’ll see an MFA or Multi-Factor Authentication section.
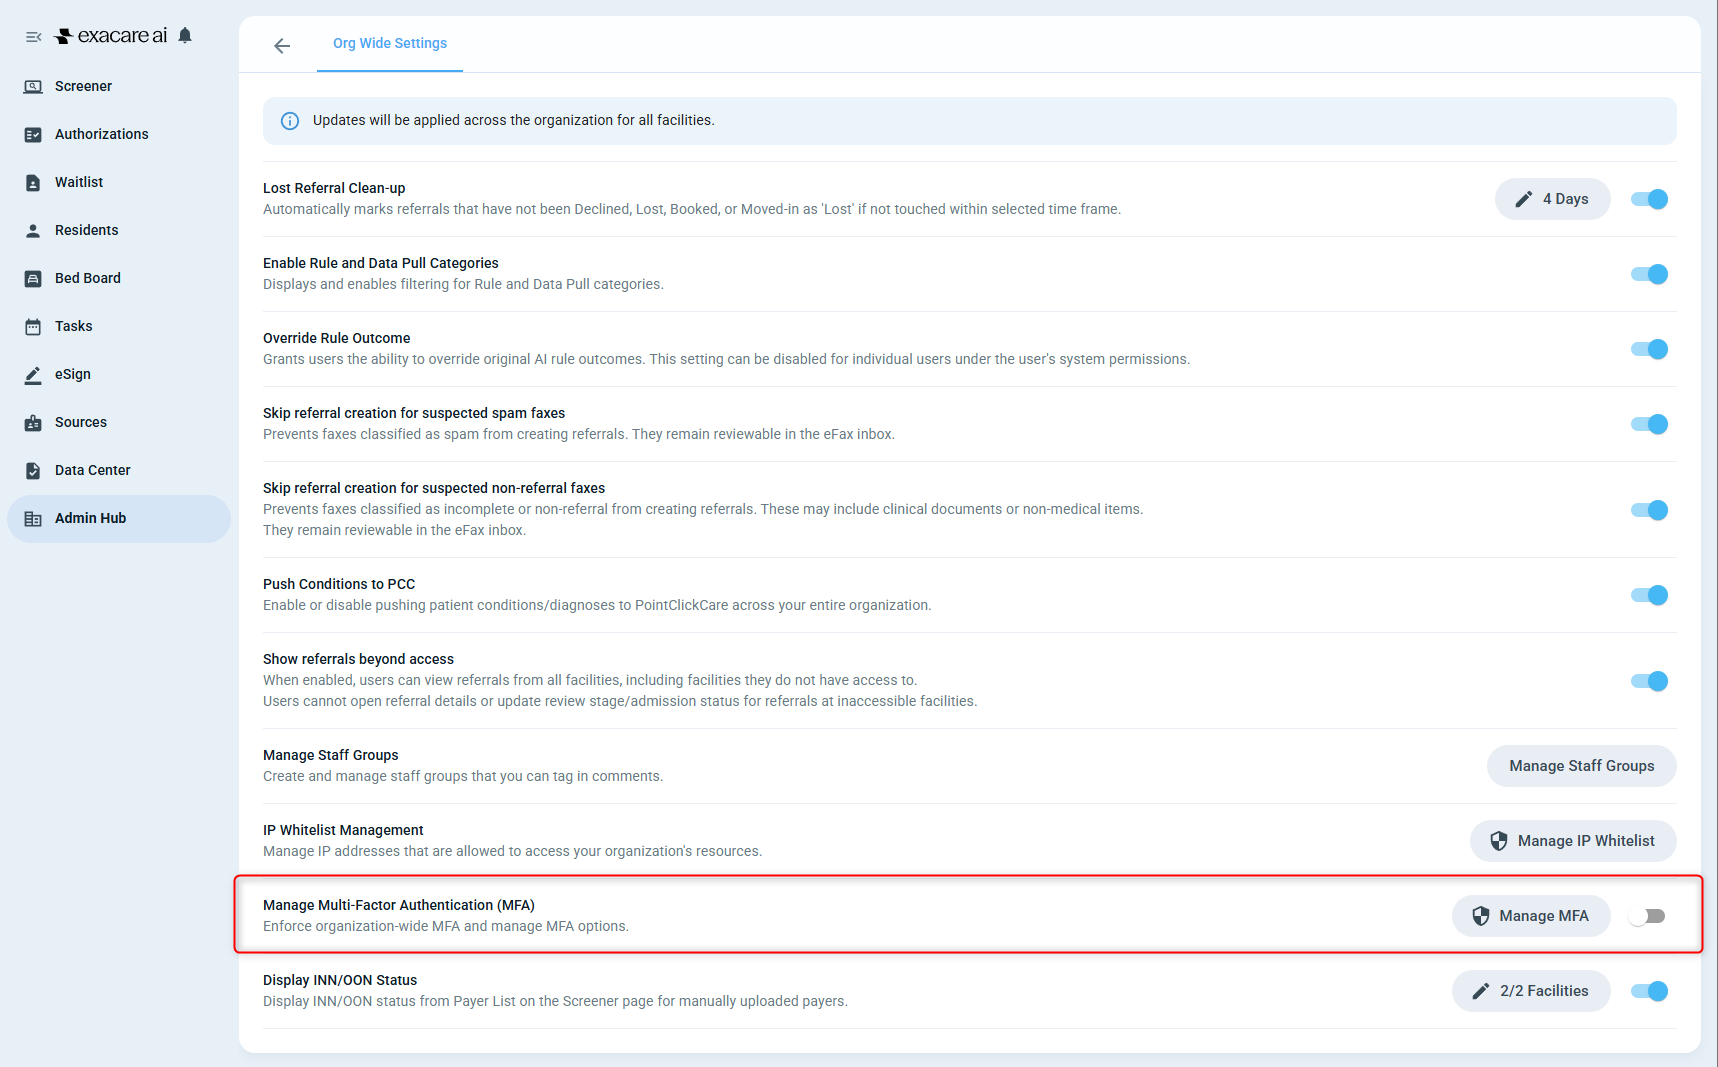
In the MFA section, toggle “Manage MFA” from OFF to ON.

A confirmation pop-up will appear explaining that, once confirmed, MFA will be required for all users in your organization on their next login.
Choose allowed MFA methods. The authenticator app is checked by default and cannot be disabled. You can add email-based MFA if you choose.
Click 'Confirm' to save.
Now MFA is enforced org wide.
The next time any users logs in, they will be required to complete MFA enrolment before accessing exacare.
Admission Alerts
Admission alerts (also called "no admit" lists) are a feature in exacare AI that allow you to:
Proactively flag patients that SNFs do not want to accept due to clinical, financial, or behavioral reasons.
Automatically match incoming referrals against this list.
How the feature works:
When new referrals are added (manually or automatically from referral platforms), the system automatically tries to match them against your admission alerts list.
Matching uses name similarities, initials, DOB, or aliases to identify potential matches.
When there's a match, users can review, dismiss, or take appropriate action.
Admission alerts are organization-wide.
If you are unable to edit the admission alert, your user permissions may be limited. Please contact your facility lead to update your access or add the alert for you.
How to edit / add admission alerts:
Navigate to the screen tab of a single facility (you cannot access admission alerts from the "All Facilities" view).
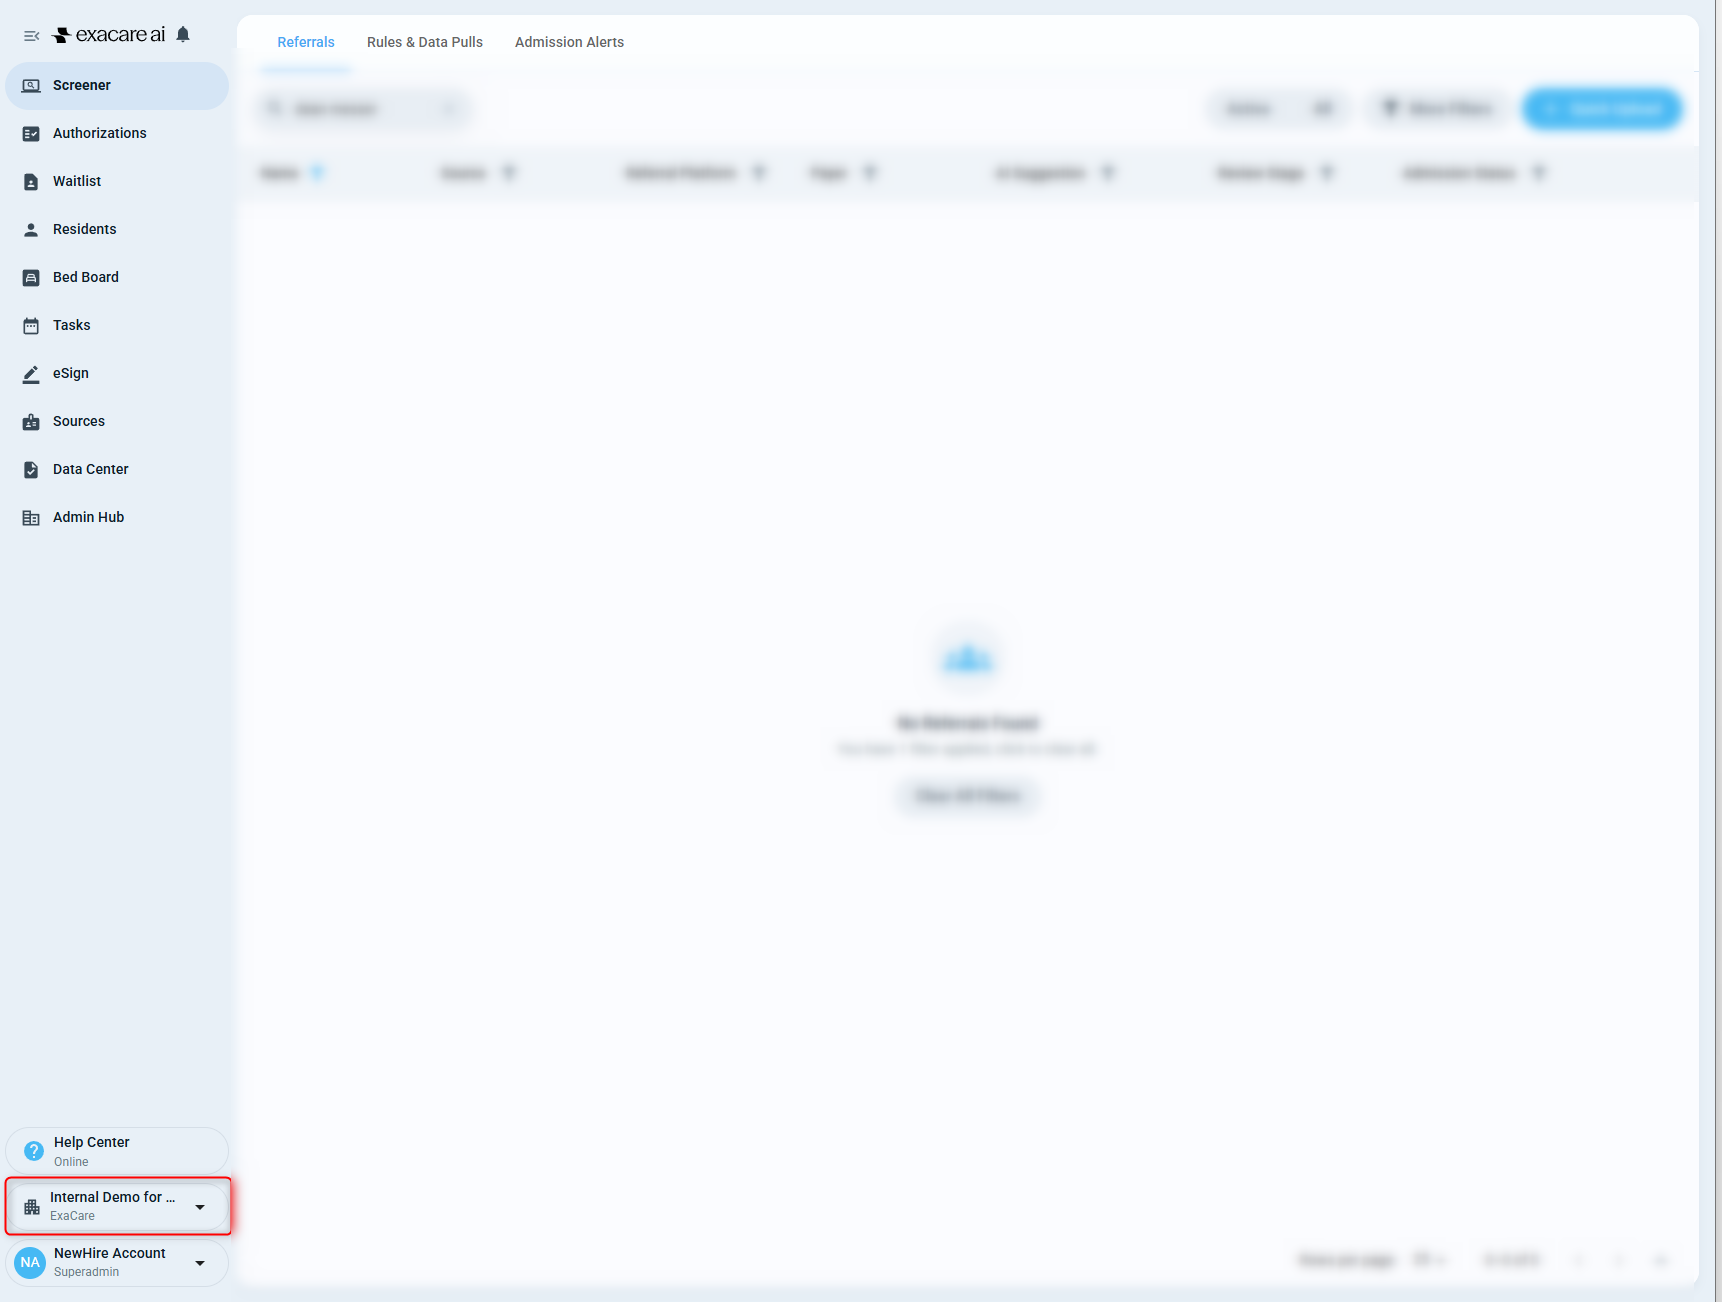
Navigate to "Admission alerts" along the top of the screener tab

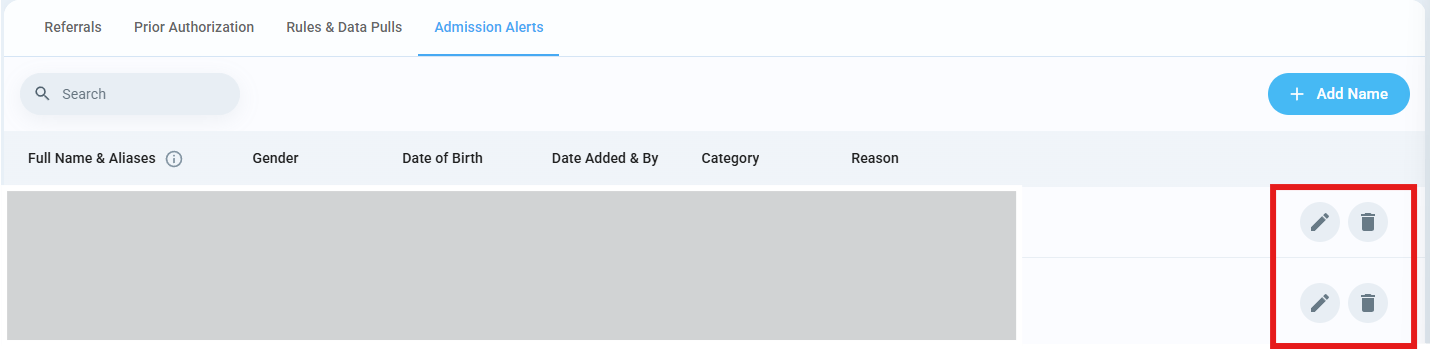
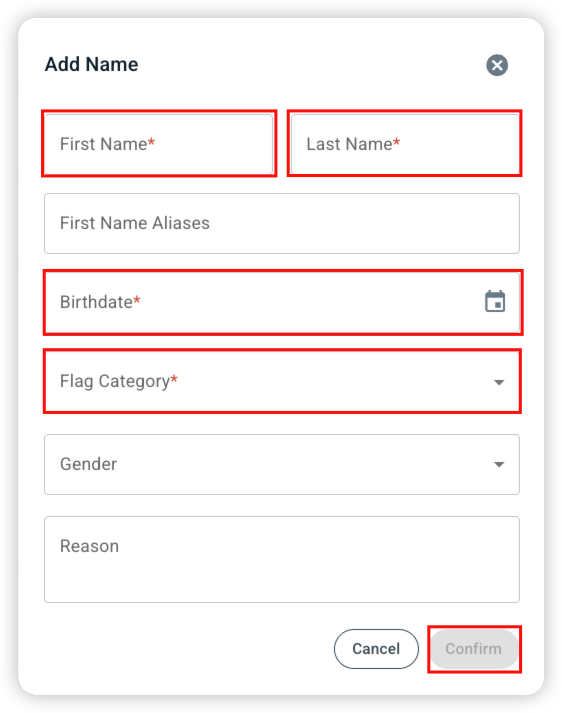
To add a new Admission Alert select "Add Name" and fill in the required information.

You can edit and deleted current Admission Alerts by selecting the pen icon or the trash can on the right hand side.