1. Push a Resident to PointClickCare (PCC)
Last updated: June 11, 2026
Please refer to the training video below for a Push to PCC Tutorial:
In exacare
Step 1: Push the referral from exacare ai to PointClickCare:
Locate and select the referral in the ‘Screener’ page that you want to Push to PointClickCare:

Navigate to the tab titled ‘PointClickCare’, you will be at Step 1 of 3: Create Resident Profile in PointClickCare
At this point, you are not pushing any documents over, this step just creates the resident profile in PointClickCare.

To proceed, click ‘Push to PointClickCare’
Note:
Exacare ai will extract and pre-fill information if found in the Admissions Package. The required fields are ‘First Name’, ‘Last Name’, ‘Gender’, and ‘Date of Birth’. These can be directly edited in exacare and afterwards in PointClickCare as well.
If only a partial SSN is included in the Admissions Package, you can use 0’s or 1’s to make the field numerical as it must only contain numbers. You can edit this directly in PointClickCare later as well.

Next, you will be at Step 2 of 3 : Accept External Pending Resident in PointClickCare
Note:
This step directs you to PointClickCare. You need to log in to your PointClickCare account and accept the resident.
At this point, there will be an orange ‘i’ icon next to the ‘PointClickCare’ tab indicating that the push has been started, but not yet completed. Additionally, the PointClickCare chips in the referral profile and on the ‘Screener’ page will remain grey until the push is complete and they turn green.


In PointClickCare
Step 2: Accept the resident in PointClickCare:
Navigate to PointClickCare, log into PointClickCare or click to an already open PointClickCare tab:

Ensure you are in the correct facility:

Navigate to ‘Admin’ or ‘Clinical’ (as everyone’s PointClickCare is configured differently) → ‘Residents’ :
Click ‘External Pending’:
Find your referral by either using the search bar, or selecting the first letter of their last name:

Select ‘Actions’ -> ‘Accept’:

Select ‘Create New’ or ‘Merge Contact’
You will be given the option to ‘Merge Contact’ if there is a potential match record in PointClickCare already (this is based on matching name, DOB, and SSN if available).

Fill in any additional fields for your workflow. Exacare will pull over any information that was populated in Step 1:

[IMPORTANT] Scroll down and check off ‘Waiting List’ to ensure this Resident can be found on the Waitlist:

Click ‘Save’:

This resident profile has now been created and step 2 is complete. Navigate back to exacare to push over the details and documents:

Navigate back to exacare, since you have completed Step 2 of 3: Accept 'External Pending' Resident in PointClickCare → click ‘Next’:

In exacare
Step 3: Push remaining details to PointClickCare:
Step 3 contains four parts: ‘Preliminaries’, ‘Allergies’, ‘Conditions’, and ‘Docs’
‘Preliminaries’:
Review the extracted information or add Preliminaries information
Exacare ai will extract and pre-fill information if found in the Admissions Package for “Referral Contacts’, ‘Care Information’, and ‘Source Information’
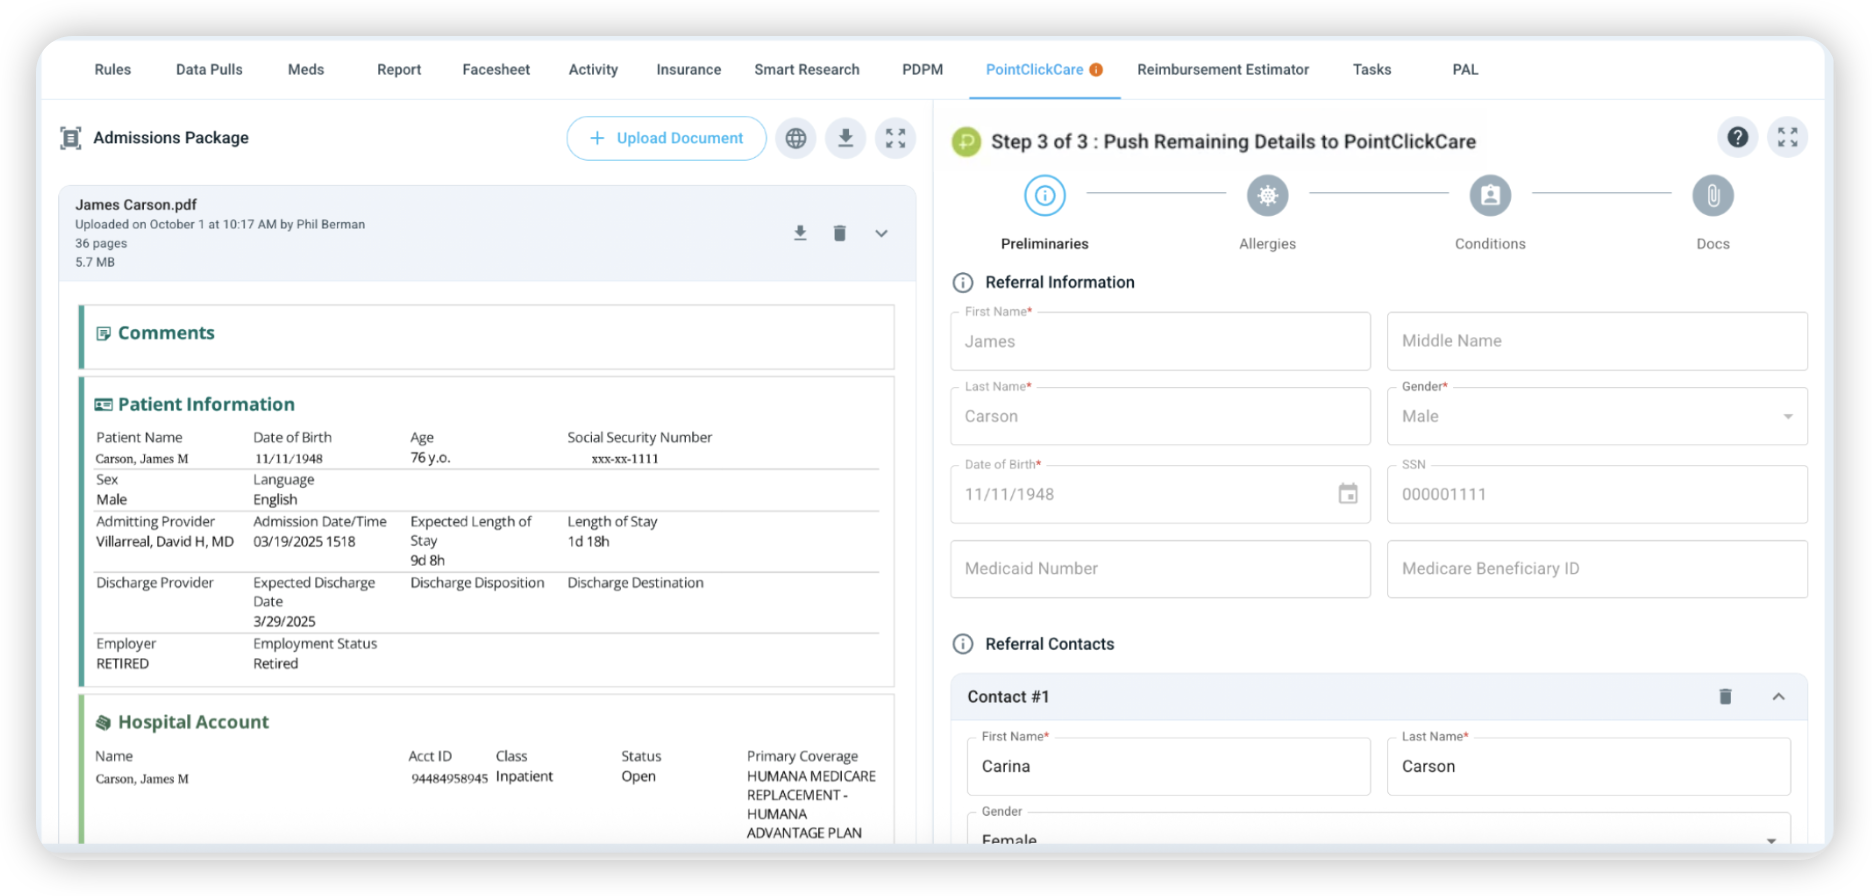
You can always delete or add ‘Referral Contacts’:


In the ‘Source Information’ section, ‘Source Phone’ and ‘Source NPI Number’ are required fields from PointClickCare in order to complete the push. You can use the link to search the NPI Registry if you do not have the number on hand.
If a referral is coming from the community or home (not a hospital), you can populate the ‘Source NPI Number’ with 0’s or 1’s.

This pop up will appear if it is the first time a referral has been sent from this source, or if there is no saved information for this source. Click ‘Update & Save’ so future referrals from this source will have this information pre-filled:

Once saved, a popup will show in the bottom left corner.
Click ‘Next’ to proceed to the ‘Allergies’ section:
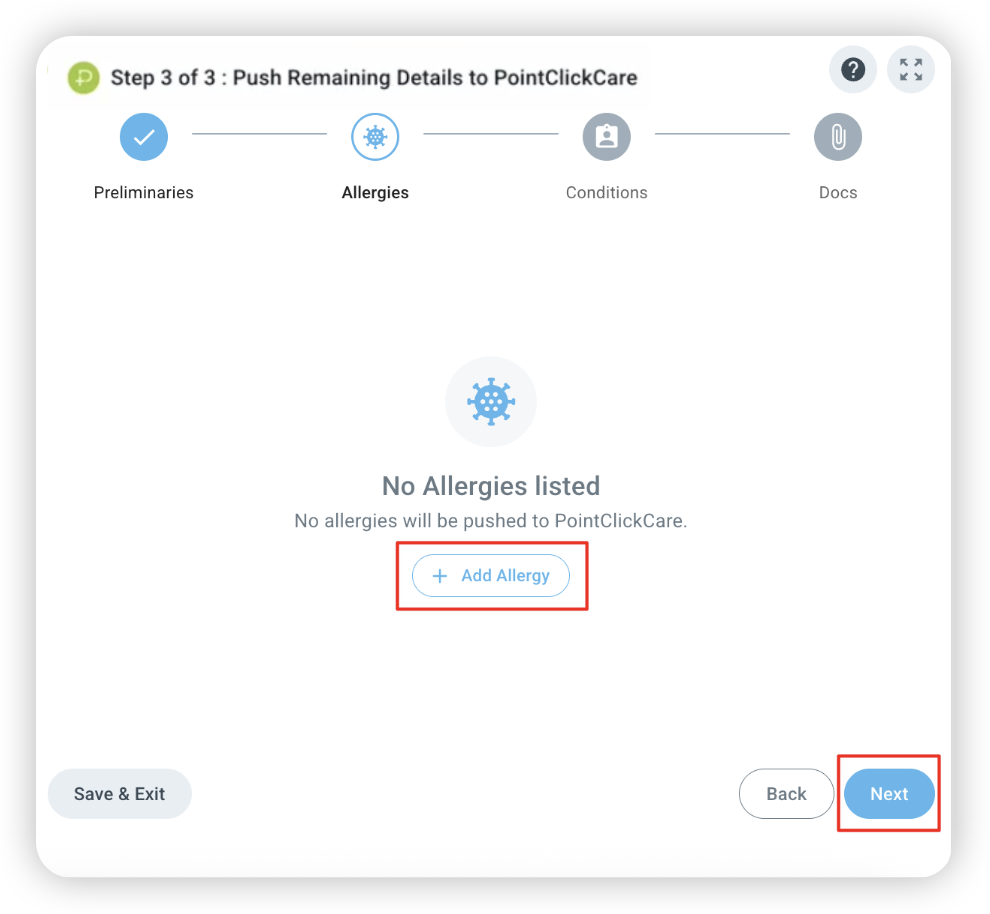
‘Allergies’
Review the extracted information or add allergies
Note:
Exacare ai will extract and pre-fill information if found in the Admissions Package, if there are none listed, this section will be empty but you can always choose to ‘+ Add Allergy’’.
Click ‘Next’ to proceed:
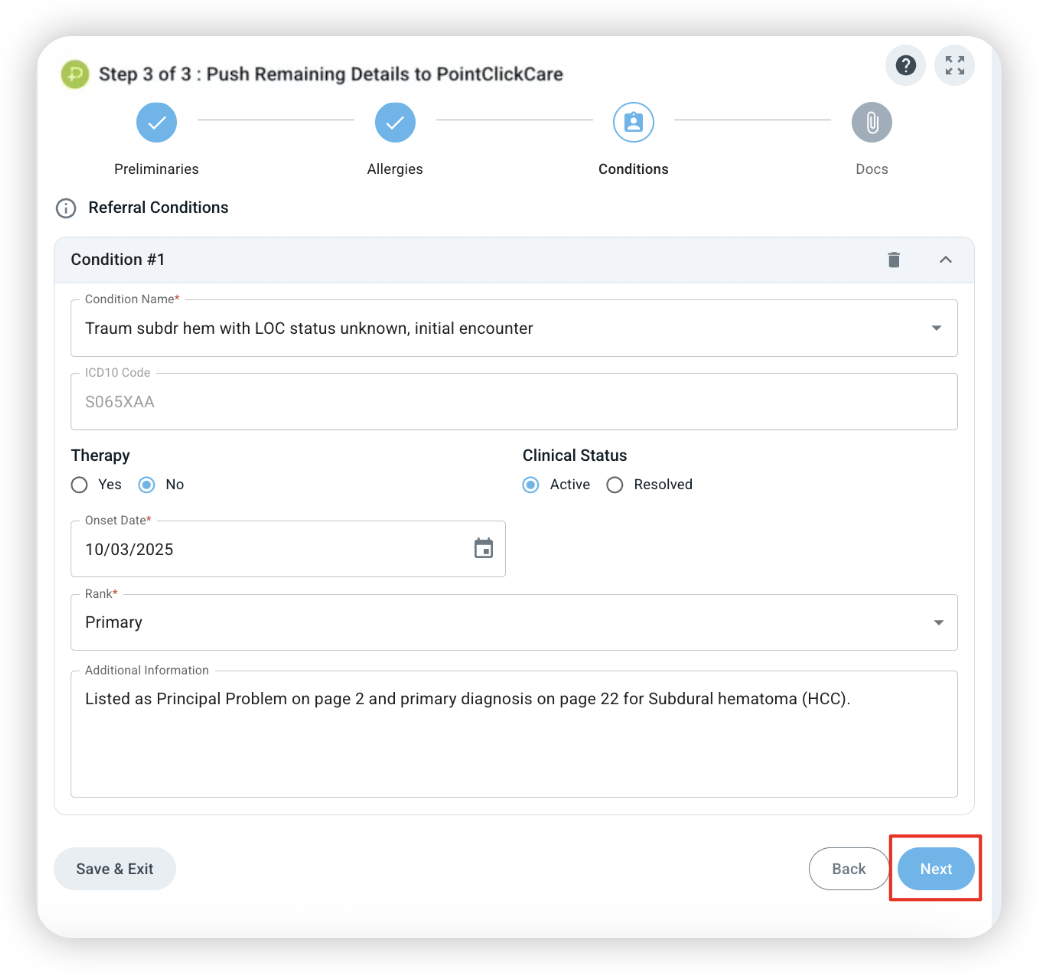
‘Conditions’
Review the extracted information or add conditions
Note:
Exacare ai will extract and pre-fill information if found in the Admissions Package, if there are none listed, this section will be empty but you can always choose to ‘+ Add Conditions’’.
Click ‘Next’ to proceed:
‘Docs’
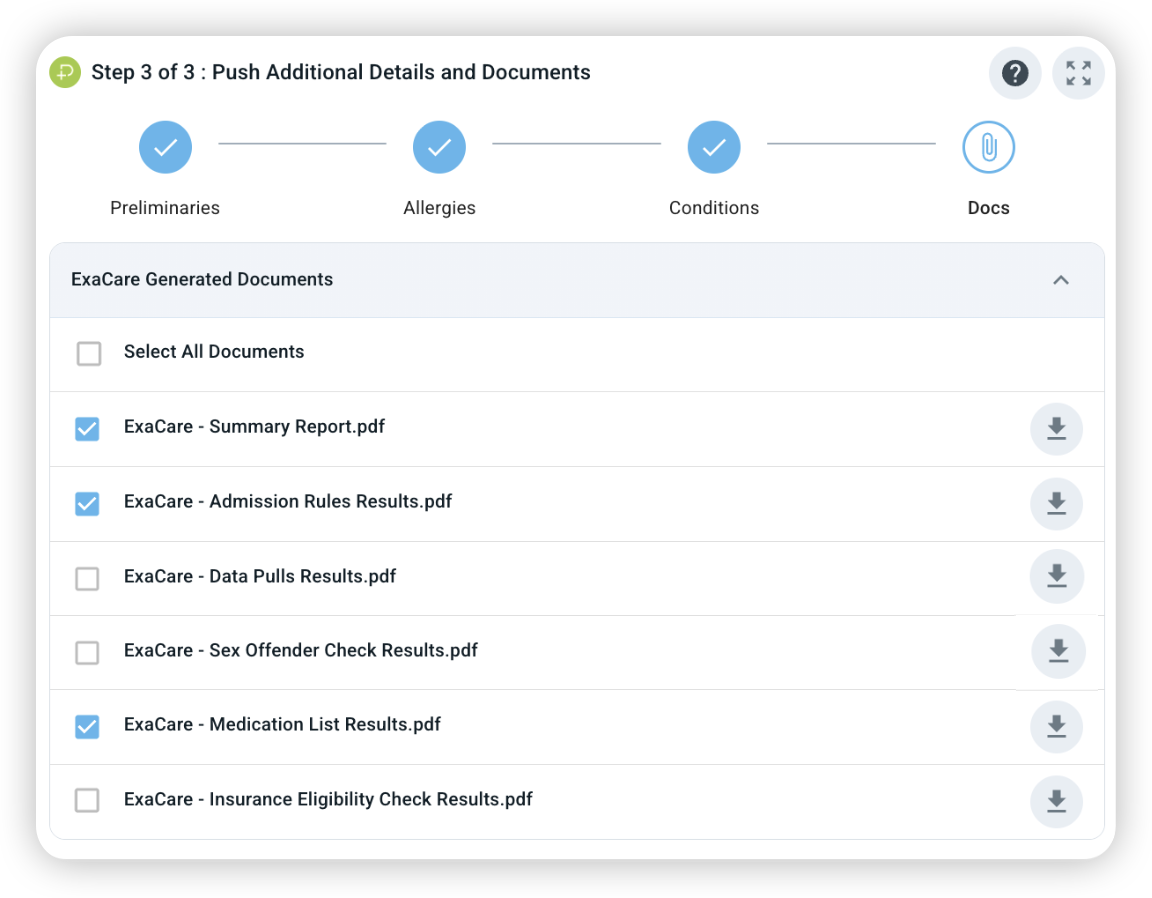
This contains ‘exacare Generated Documents’, ‘Admission Package Documents’ and ’Storage Documents’. Select which ones you would like to push over and click ‘Push to PointClickCare’
‘Exacare Generated Documents’ includes documents that were created in exacare:
‘Admission Package Documents’ includes documents that were sent by the hospital, or quick uploaded into exacare:
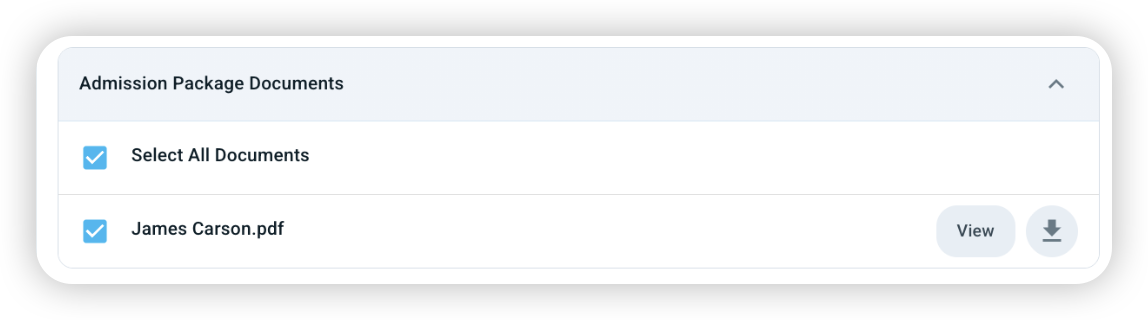
’Storage Documents’ includes documents added to exacare that did not affect the AI analysis and have no impact on results such as Rules and Data Pulls, Meds table, Reports, etc. You can choose to directly add storage documents here.

Push Completed
In exacare,
Once completed, (1) you will see a summary of all the information that was pushed over (scroll down to see more), (2) the option to ‘+ Push Additional Details and Docs’, and (3) the ‘PointClickCare’ chip turn green:

In PointClickCare,
View contacts under ‘Admin’ -> Residents -> ‘Resident Profile’:

View allergies and conditions under ‘Clinical’ -> Residents -> ‘Med Diag’ and ‘Allergy’ or may appear in ‘Inbound’ section:

View documents under ‘Admin’ -> Residents -> ‘Misc’:

See the 'Push to PCC FAQ' article if you have more questions about the process.