2. Exporting and Deliveries
Last updated: June 11, 2026
You can save time by having key metrics delivered directly to your inbox (or your team's) on a regular basis.
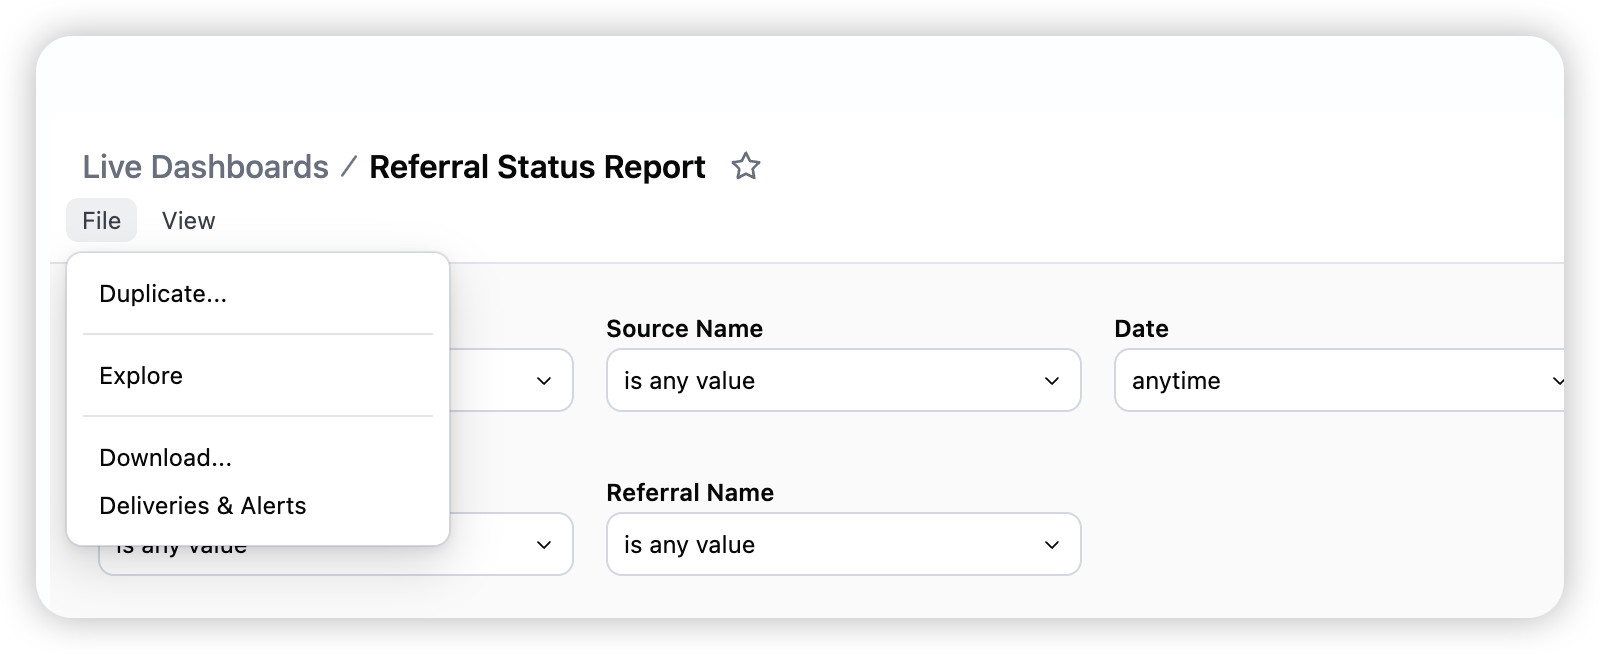
How to Schedule Send a Dashboard:
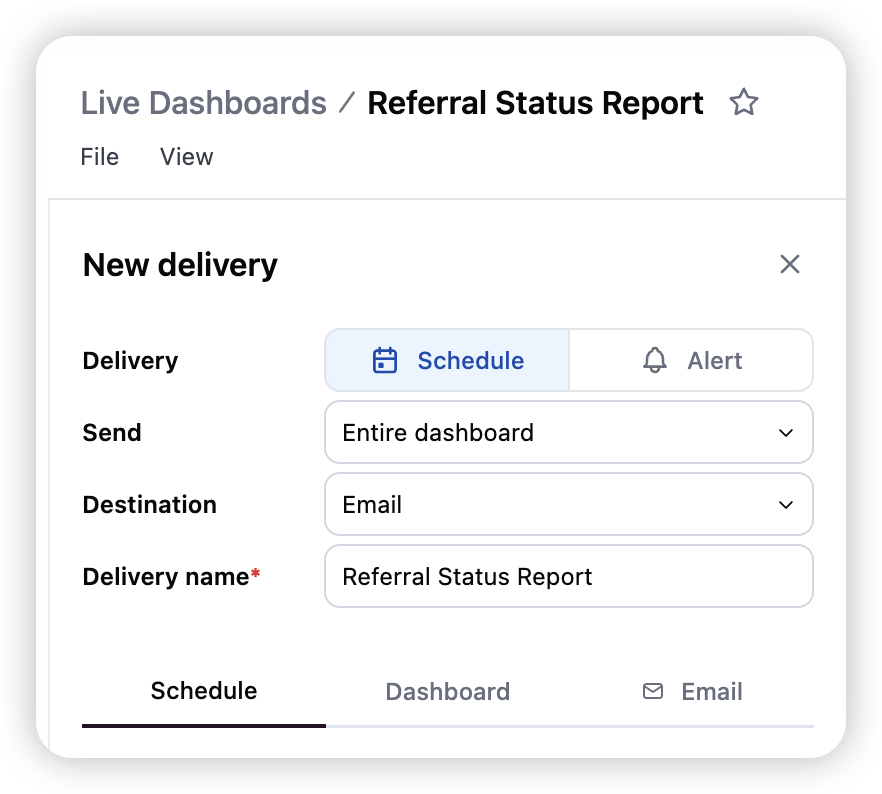
Set up your delivery
Select the dashboard you would like to schedule
Click File -> Deliveries & Alerts'.
Select the charts you would like to receive or 'entire dashboard' for tiles on the dashboard
Select 'Email' for destination
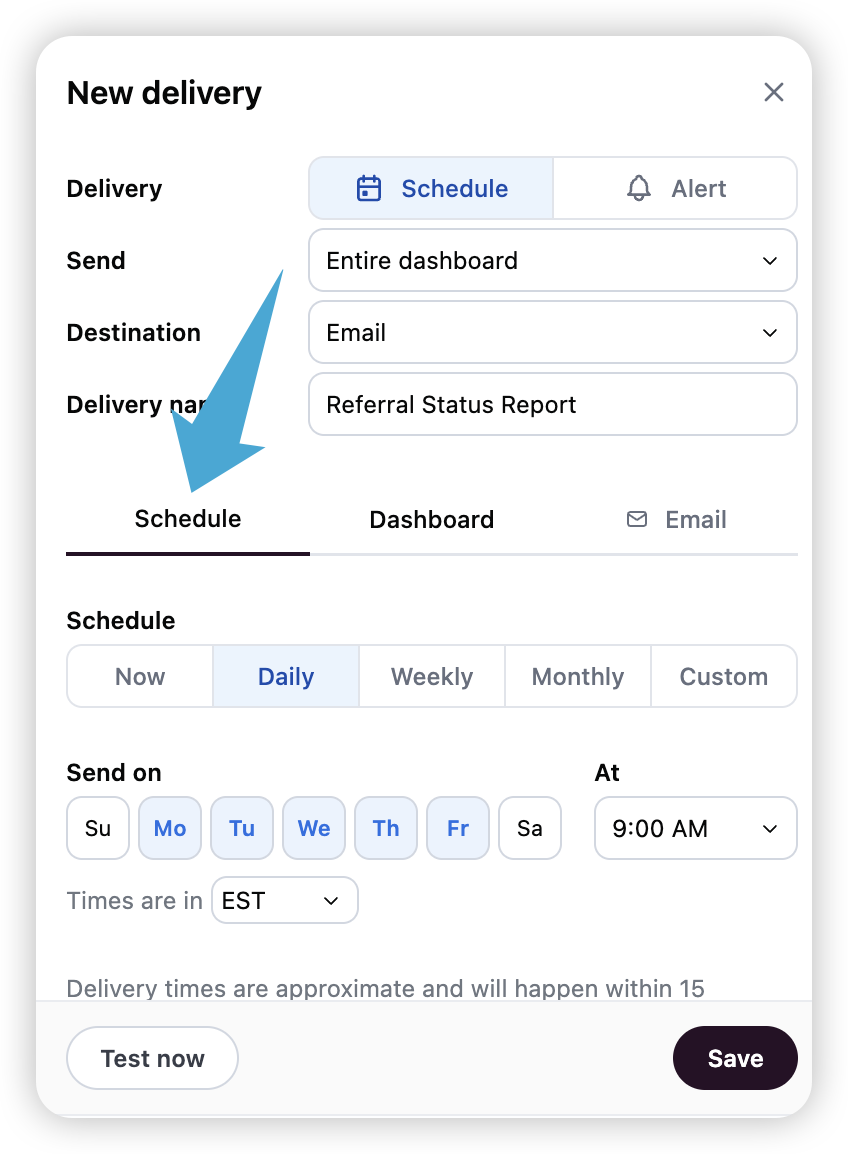
To set your cadence
Schedule the cadence and timing of your delivery.
Choose Frequency: Select Daily, Weekly, or Monthly.
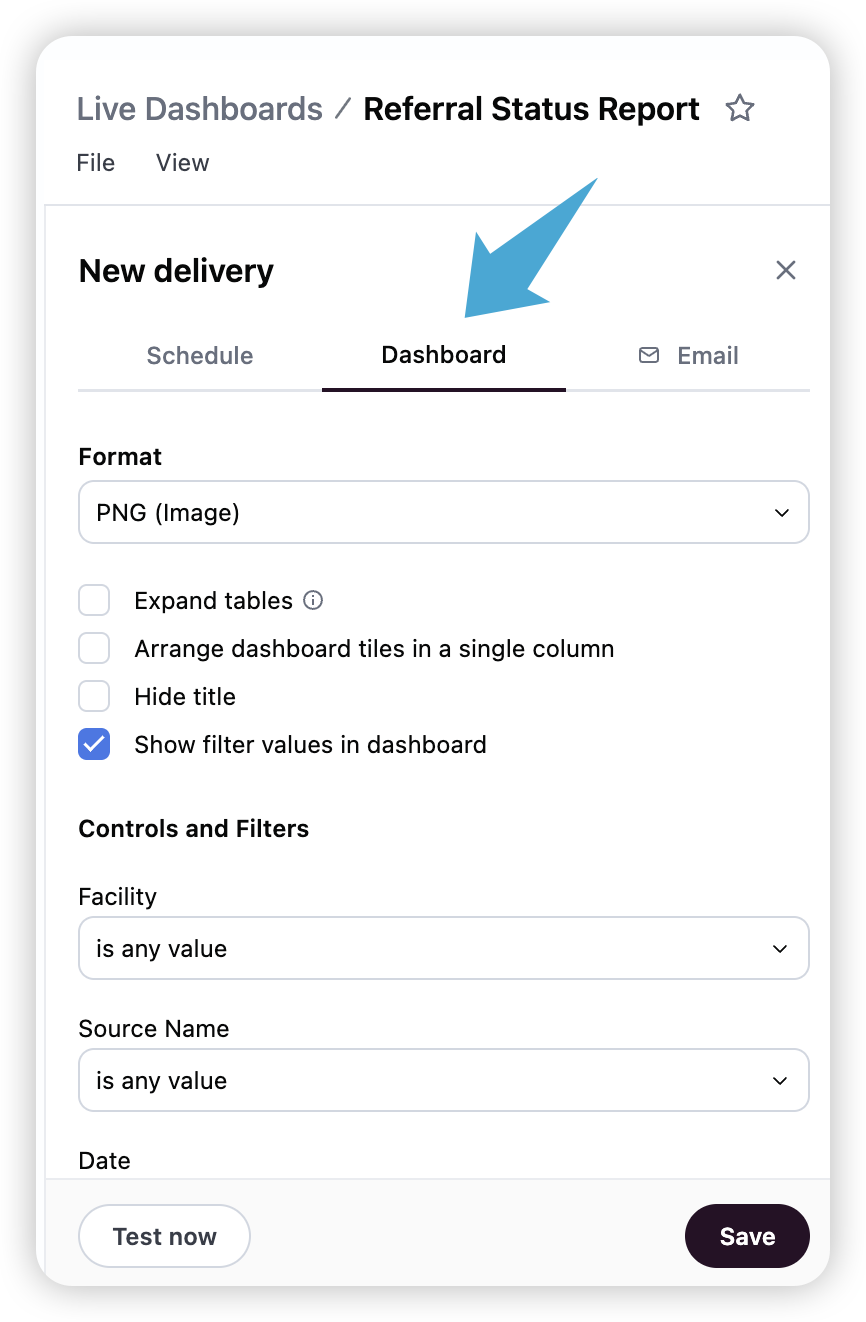
To customize your dashboard
Select the file type (likely XLSX) for Excel or PDF (for PDF, click expand tables)
Customize your controls and filters.
To set up your email delivery
Select your recipients, which can be yourself or members of your team
Sending Report Deliveries
Report deliveries can only be sent to email addresses associated with an exacare user account.
To deliver a report to someone not yet in exacare:
Add them as a user in exacare first
Once added, they'll automatically receive the appropriate permissions to view delivered reports
Note: Recipients don't need to log in to exacare to receive or view report deliveries
Create a subject line and body for your email.
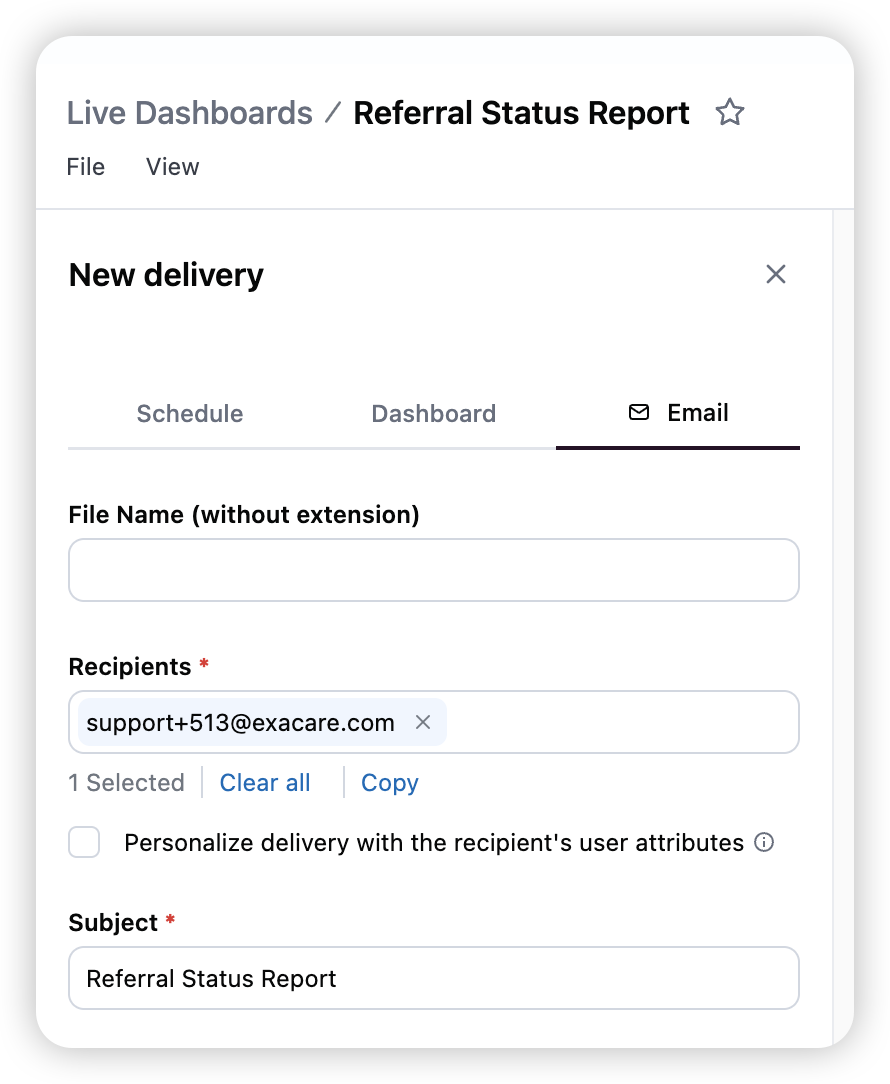
Click 'Save', and you're all set!
Custom Deliveries
Use AI to set up Custom Deliveries for your reports!
Navigate to File → Deliveries & Alerts.
Under Schedule, select Custom.
Click the Exa Stars icon to open the AI scheduling assistant.
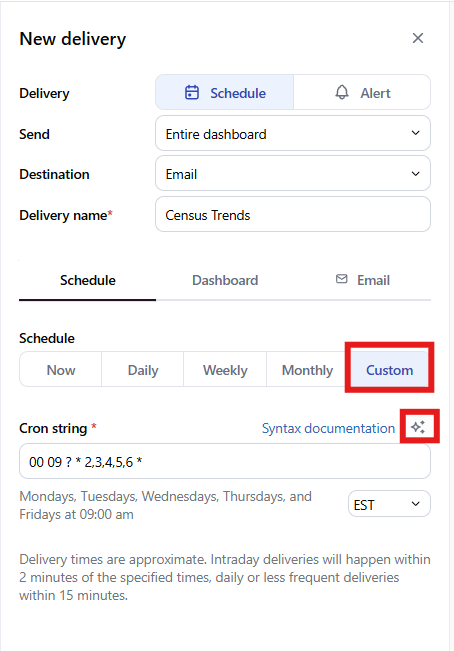
Enter your desired delivery cadence in plain language.
For example: “Biweekly on Tuesdays and Thursdays at 9:00 AM.”
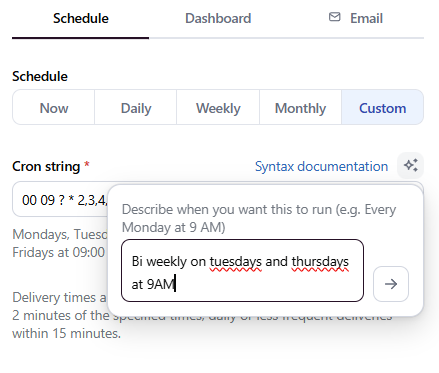
The AI will automatically generate the correct CRON expression to match your request.
Click Save to finalize your schedule!
Complete! Your report will now be delivered according to the cadence you specified.
How to Download a Dashboard:
If you need to pull data into Excel for deeper analysis or save a PDF for a meeting:
Open the report you want to share.
Click the File button, then Download
Select Your Format:
PDF: Best for presentations and quick reading. Make sure to click 'Expand tables'.
CSV / Excel: Best for manual data manipulation or uploading to other systems.
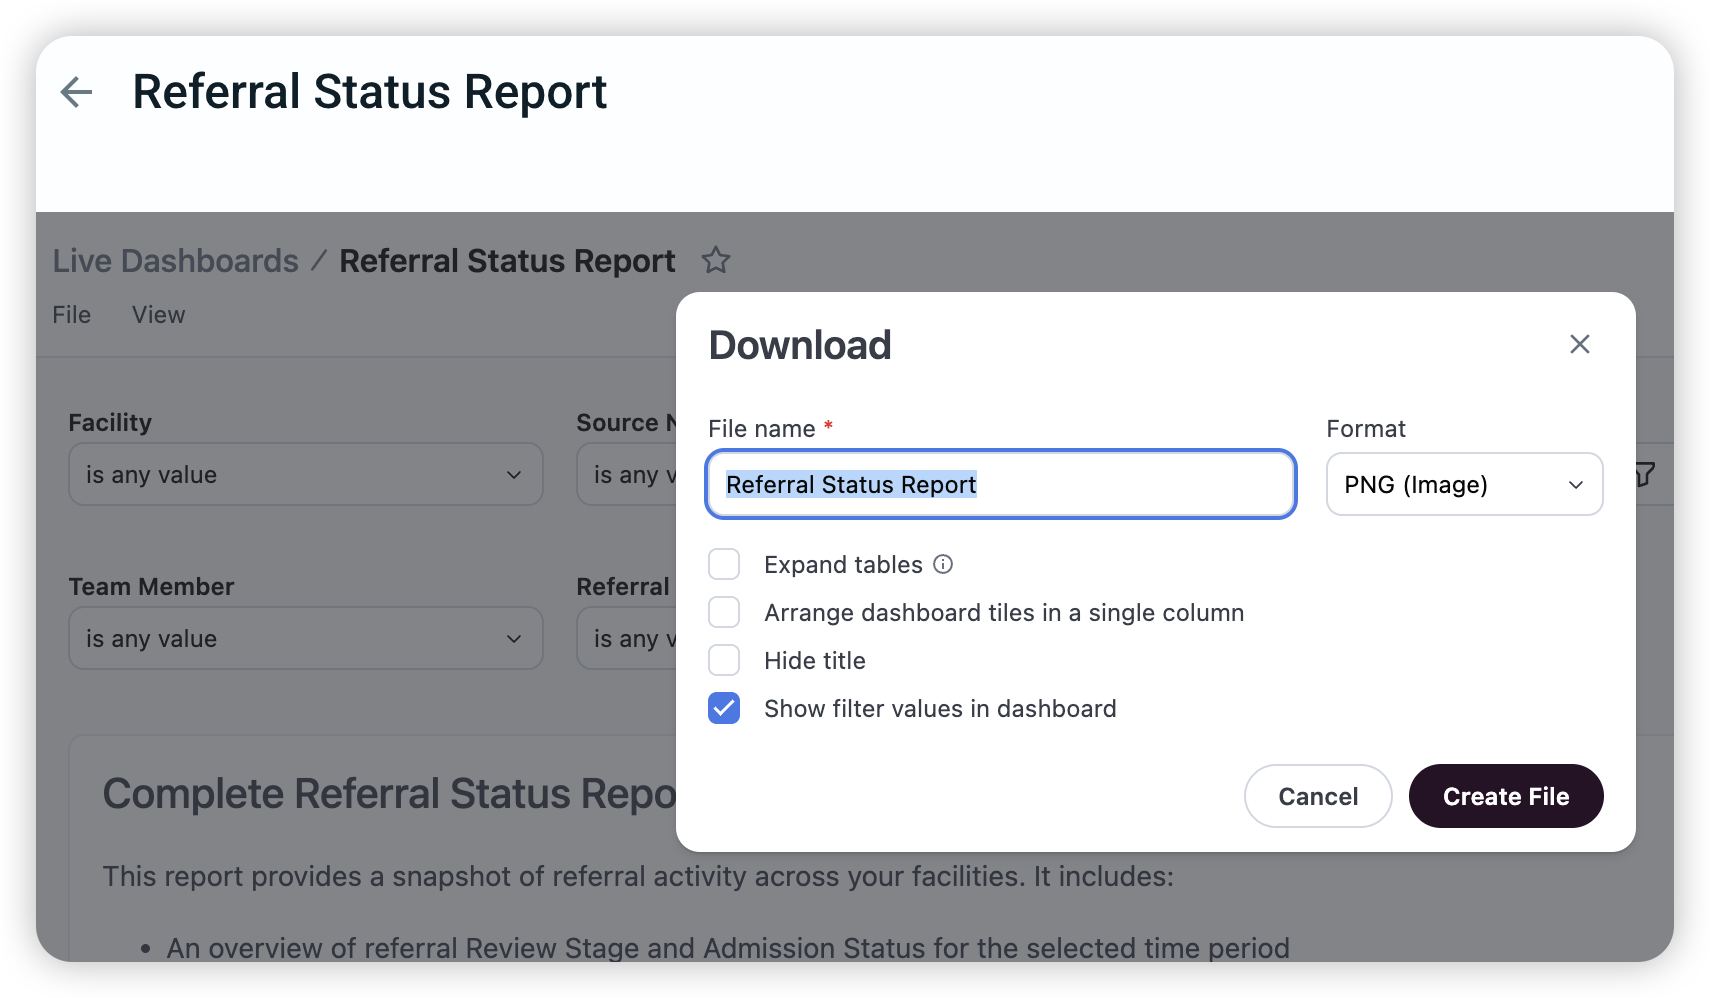
Click 'Create File'
Tile/Chart Downloads:
Locate the tile/chart you would like to download
Click the 3 dots in the top right corner of the tile
Click "Download"
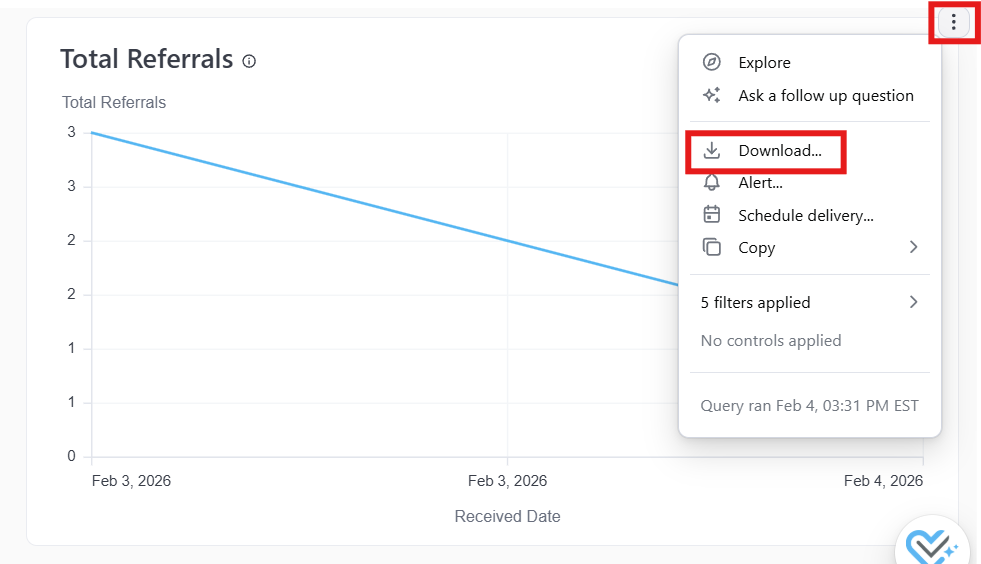
Name the file and select the preferred file type (i.e csv, pdf, excel, etc...)
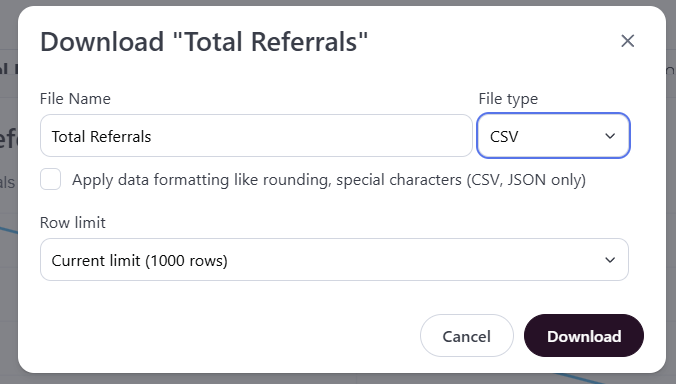
Click "Download" and you are done!
Video Resources:
Exporting reports
In this video, I walk through the process of exporting a report. First, you'll go to File and select Download, where you can rename your file and choose the format, such as PDF or Excel. Then select the appropriate paper size and orientation—portrait or landscape, depending on your column width.
Don't forget to click the expand tables button to ensure all rows are visible, up to a thousand. Once everything is set, you can create and download your file.
Scheduling Reports:
In this video, I walk through the process of scheduling a report. You’ll learn how to navigate to the Deliveries and Alerts section, choose the format for your report, and set specific filters. You can also personalize email deliveries and test the setup before finalizing it.
Additionally, I cover how to set alerts based on certain criteria, ensuring you stay updated on any changes.