Network Status Overview
Last updated: July 23, 2026
This guide explains how to configure the Network Status feature, including how to add payers to the Payer List and display their network status directly in the Screener tab.
Setting up the Payer List
You need enabled user permissions to configure payers in the Payer List. If you are unable to edit the Payer List, please reach out to your organization’s superadmin to adjust your system permissions.
Step 1: Complete the Payer List
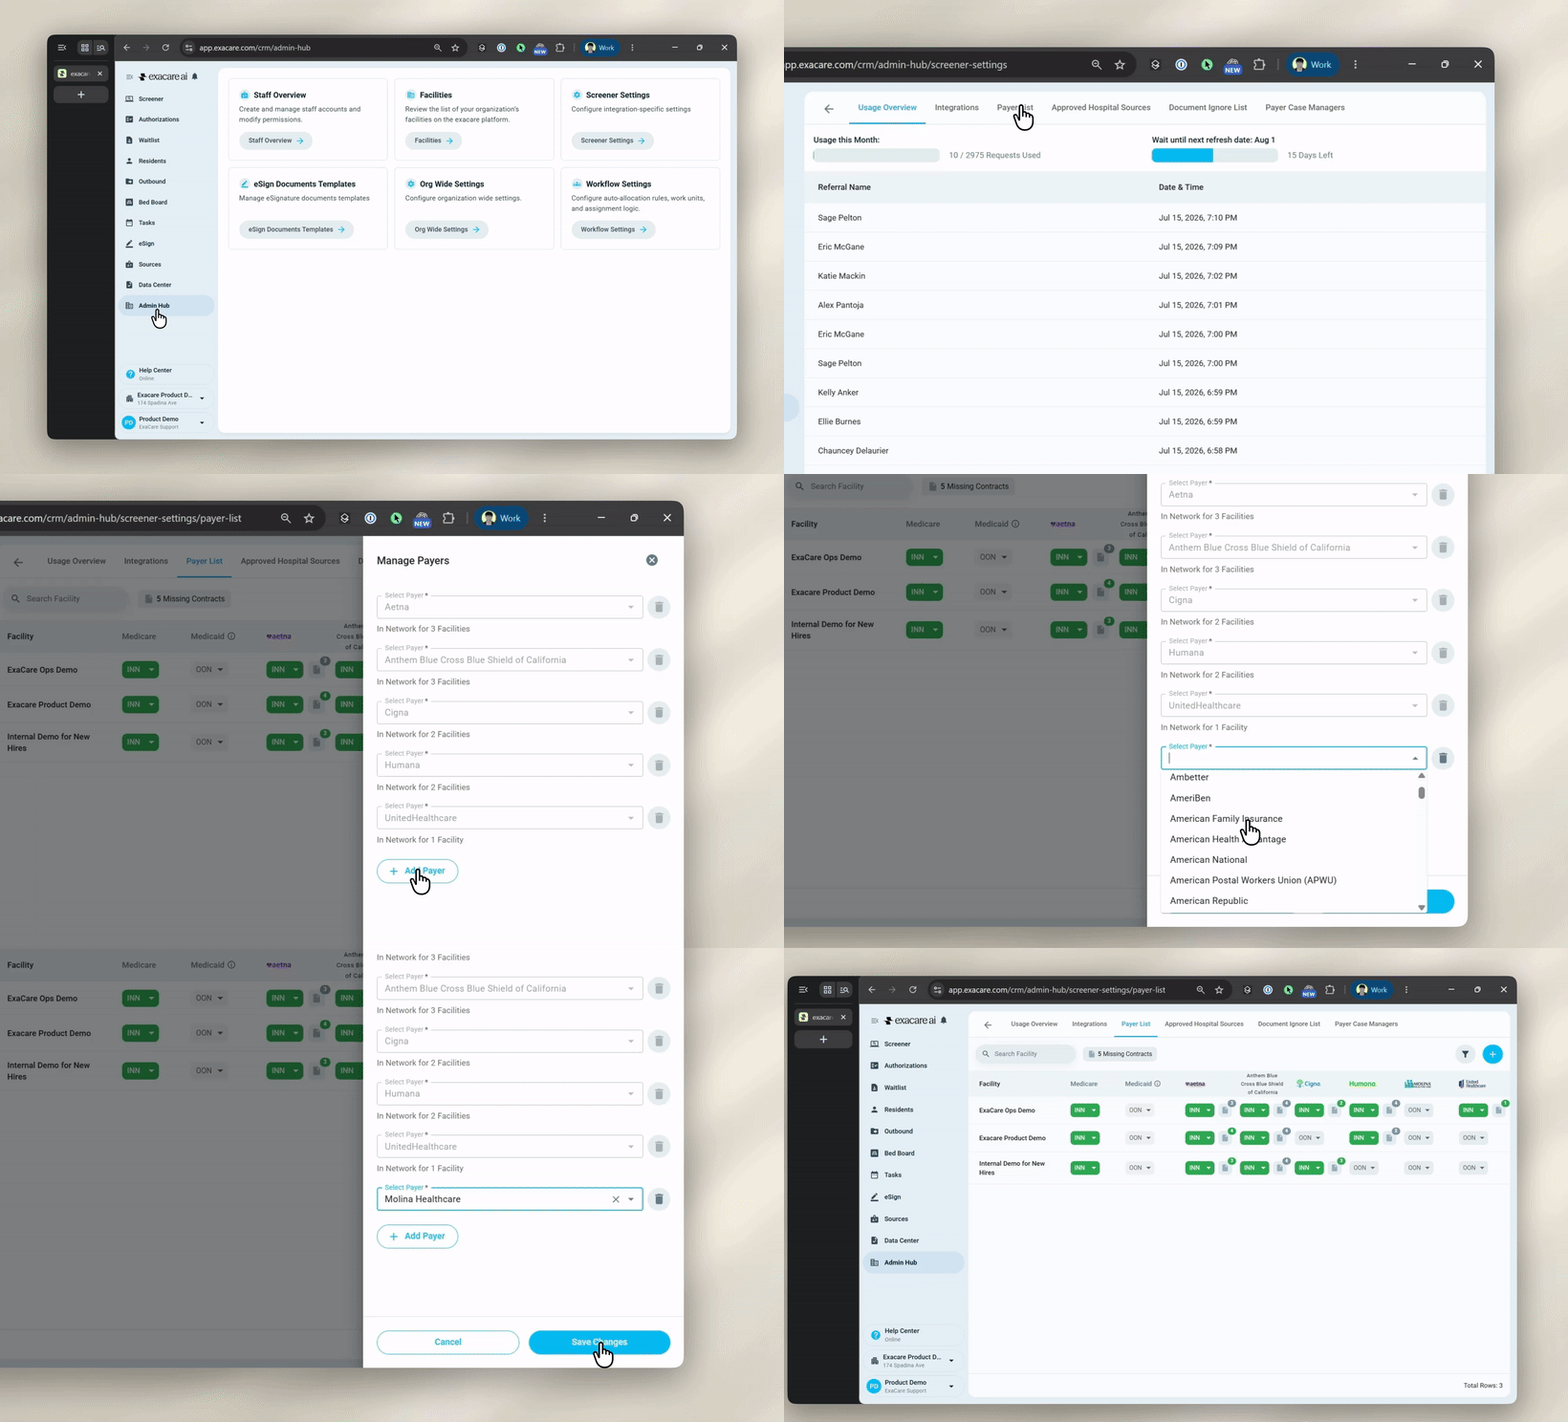
Access the Payer List
Go to Admin Hub > Screener Settings > Payer List
Add or Manage Payers
Click Manage Payers in the top right corner
To add a new payer:
Scroll to the bottom
Click Add Payer
Select or search a payer from the dropdown list (~500 options available)
Once your payers have been added, select Save Changes to update the grid
Step 2: Configure Network Status
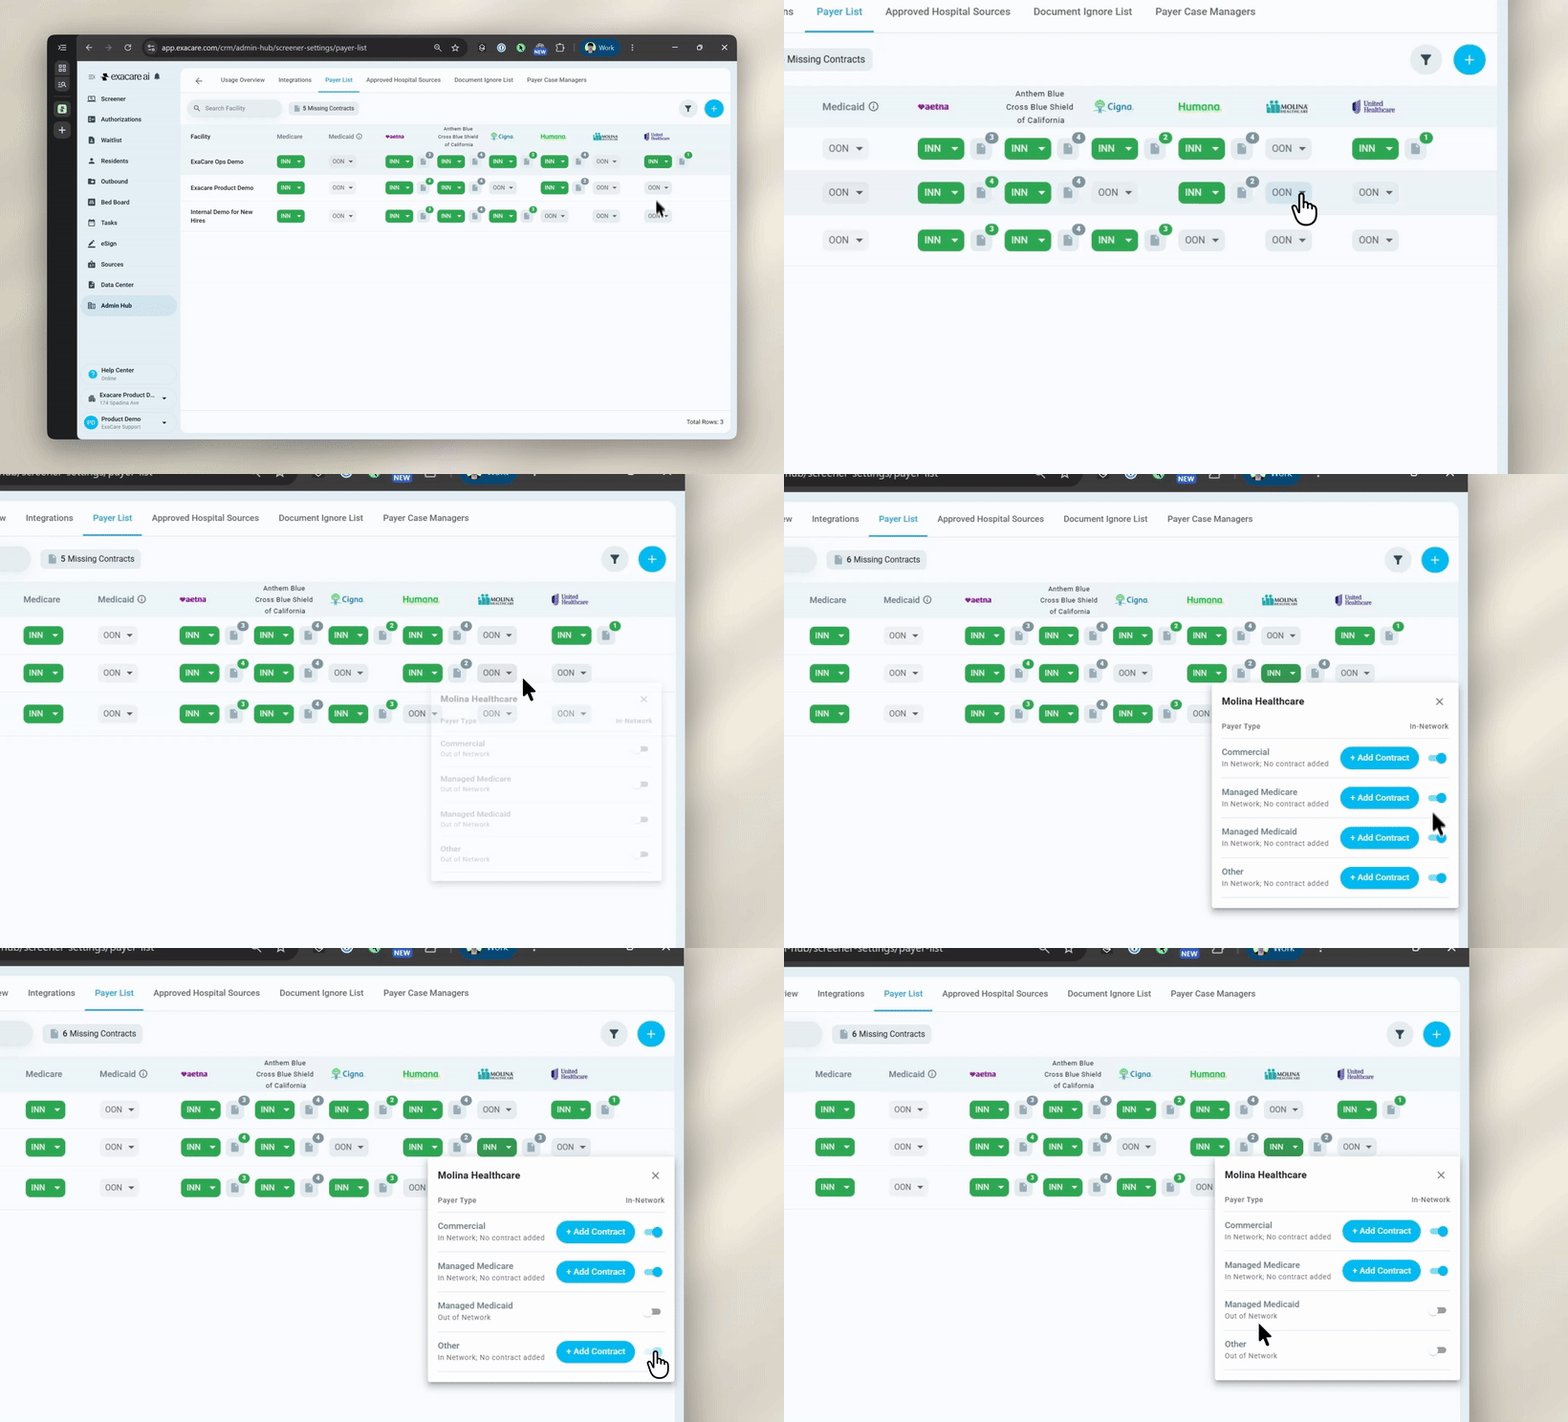
Locate the newly added payer column(s)
For each facility:
Toggle the payer In Network (INN) where applicable
Leave the payer as Out of Network (OON) if not applicable
Toggle on the payer types your organization is in network with (e.g., Commercial, Managed Medicare, Managed Medicaid, Other), and toggle off any that do not apply.
Step 3: Upload a Contract
Click the Folder icon next to the INN chip
Select Add Contract
In the sidebar:
Select applicable contracted facilities
Set the expiry date or set no expiry date
Choose payer type:
Commercial
Managed Medicare
Managed Medicaid
Other
Select contract type
Levels (contract upload required)
PDPM (contract upload optional, as authorization reports are based on CMS Chapter 8 guidelines)
Upload your contract as a single PDF document
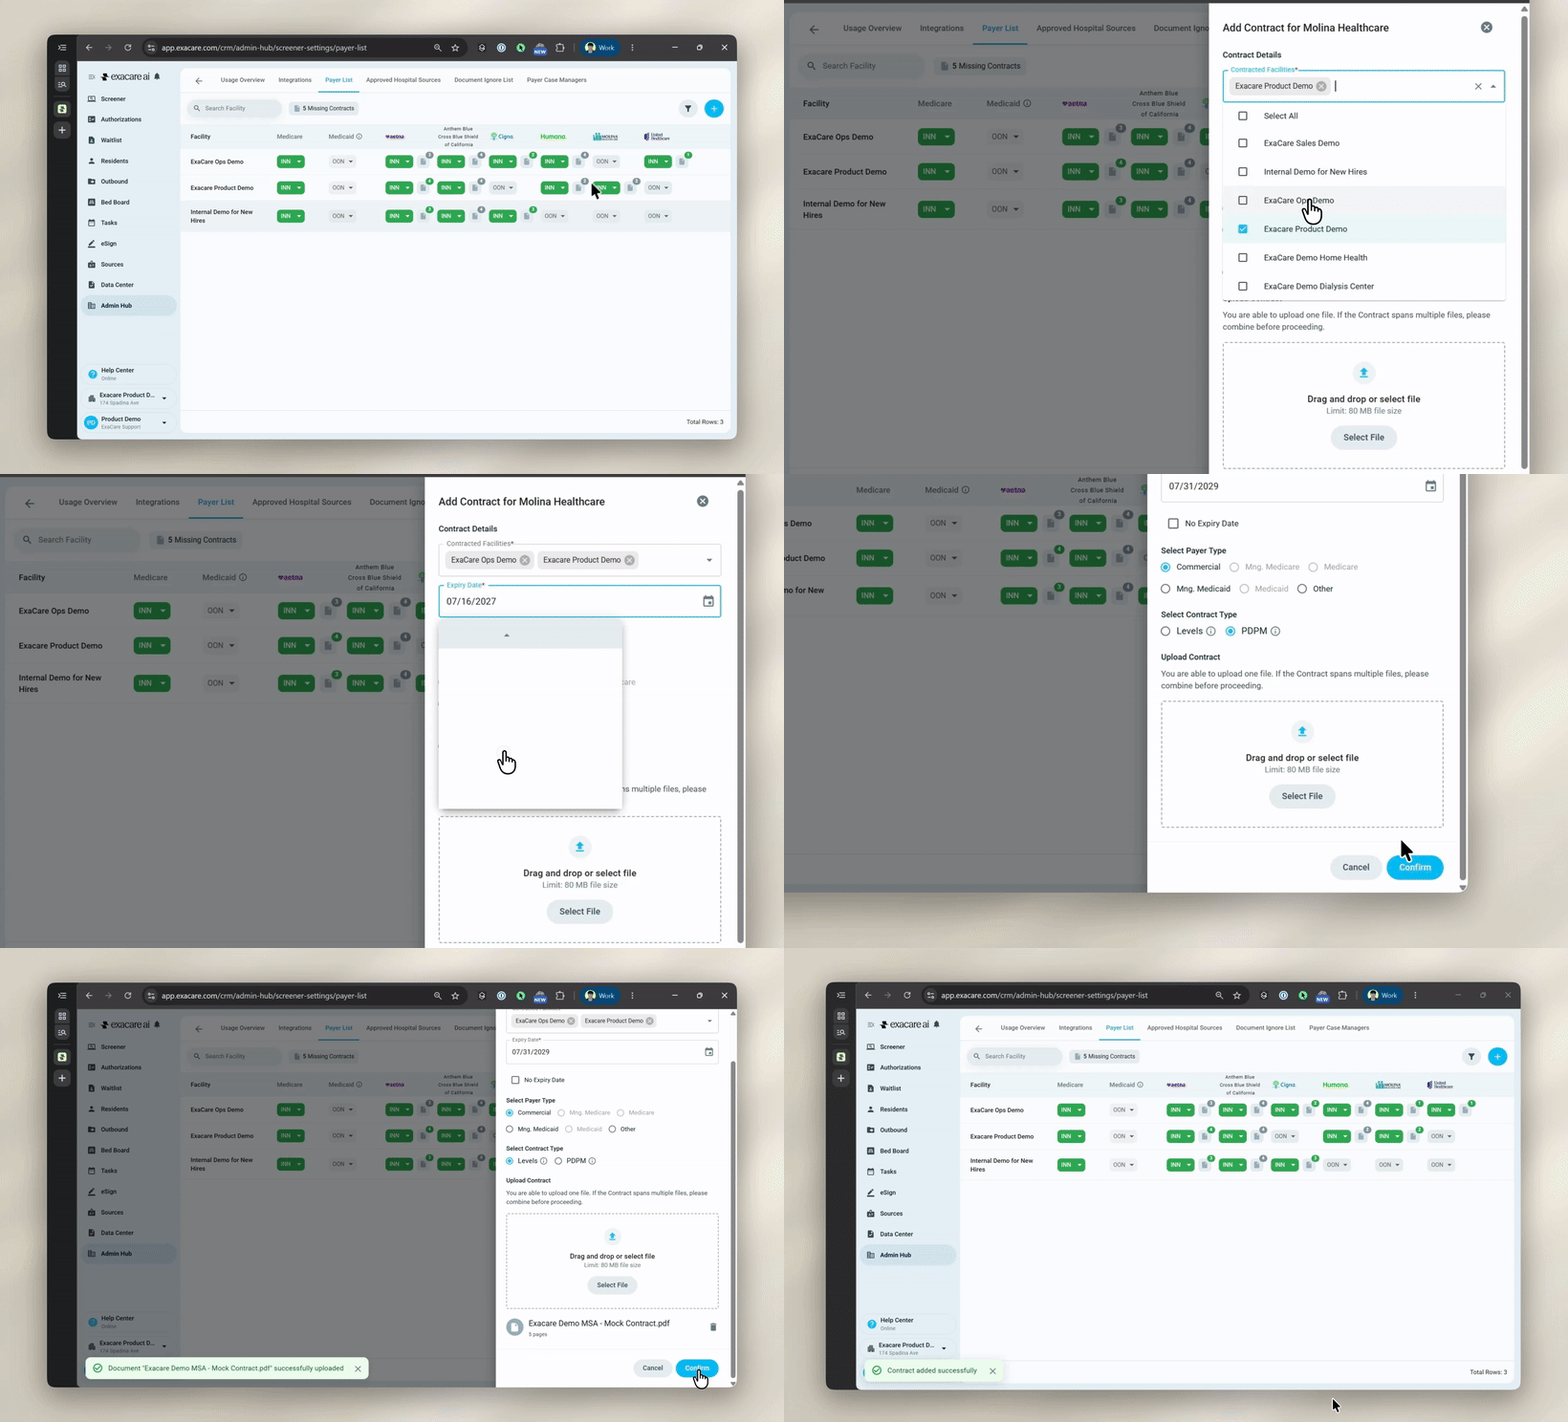
Combine all related documents (such as addendums) into a single file before uploading. Only one contract file can be stored per payer type, per facility.
Manage Network Status on the Screener Tab
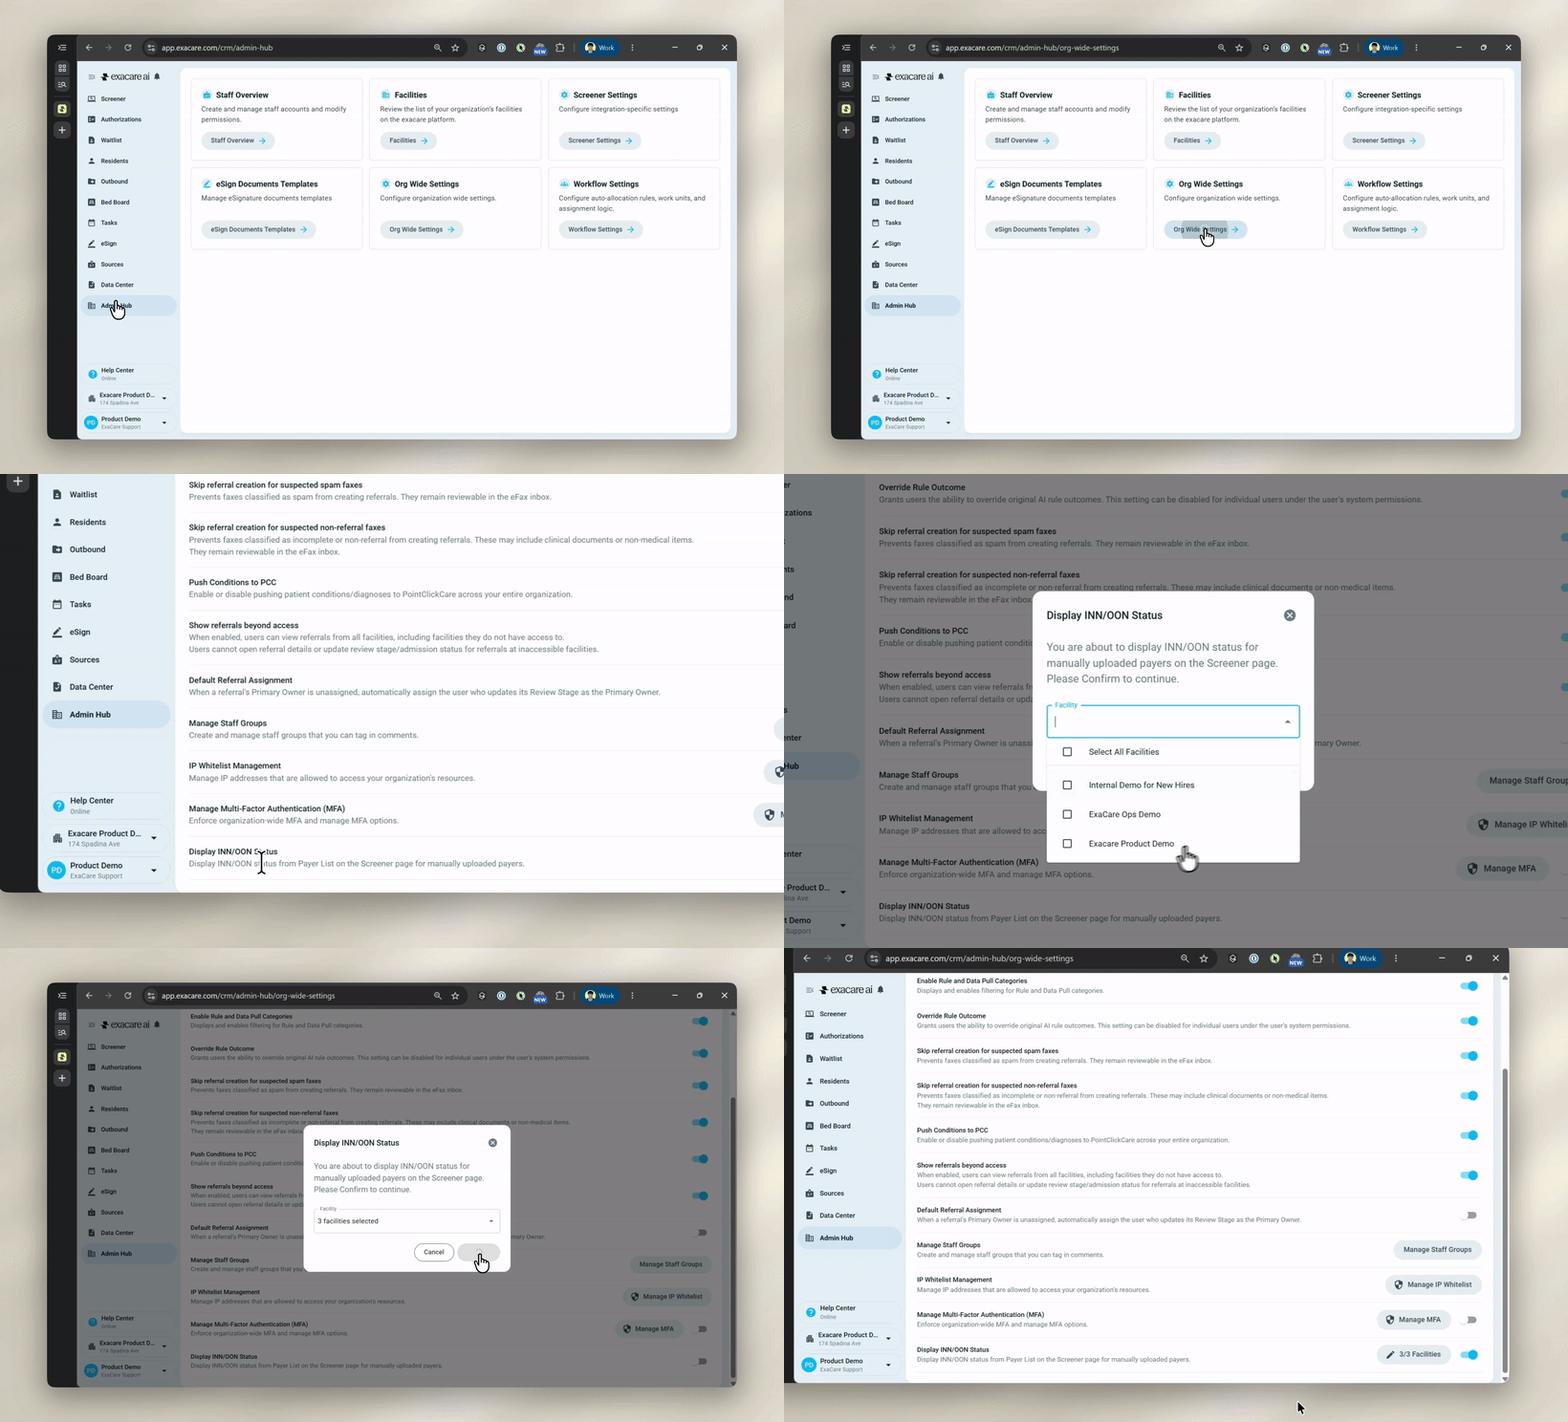
Enable the INN/OON Org-Wide Setting
This will toggle on the visual display of network status in the Screener tab.
Navigate to Admin Hub > Org Wide Settings
Toggle on Display INN/OON Status
Select the facilities where you would like to enable this setting
View INN/OON referrals
On the Screener tab, each payer listed in the Primary Payer column will now show a status icon:
Green checkmark: The primary payer is In Network.
Gray X: The primary payer is Out of Network.
No icon: The primary payer is Undetermined.
Filter by Network Status
Users can filter referrals by Network Status to quickly view In Network (INN), Out of Network (OON), or Undetermined referrals.
Click the filter icon in the Primary Payer column header.
Select Network Status.
Choose In Network, Out of Network, or Undetermined to filter the referral list.
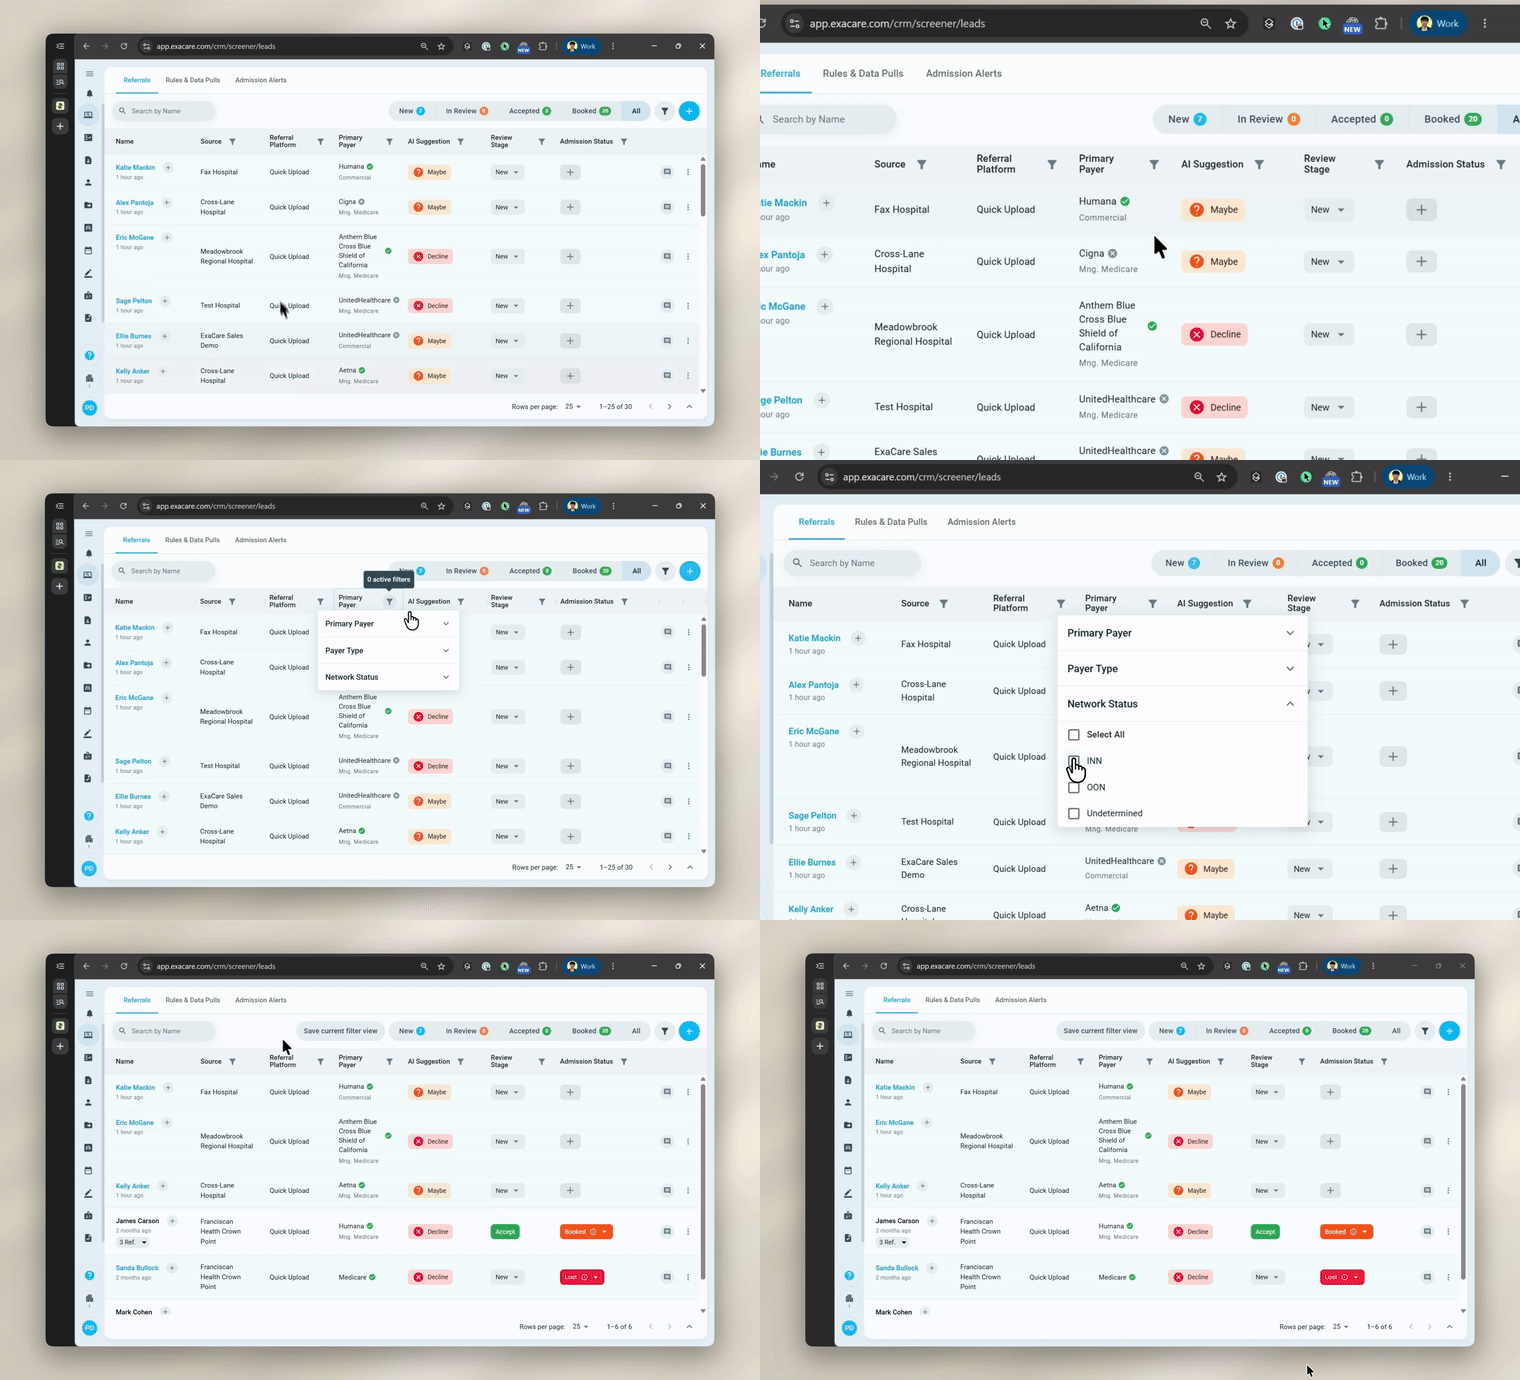
Only payers and payer types that have been added to the Payer List will show a network status indicator in the Primary Payer column. Any referral whose payer hasn't been added will automatically be marked as Undetermined, with no visual indicator.
Override a Payer’s Network Status
You can override the network status of a referral’s payer in two ways:
From the Screener tab:
Click the three dots on the far right of the referral
Select Edit payer details
Change Network Status to either In Network, Out of Network, or Undetermined
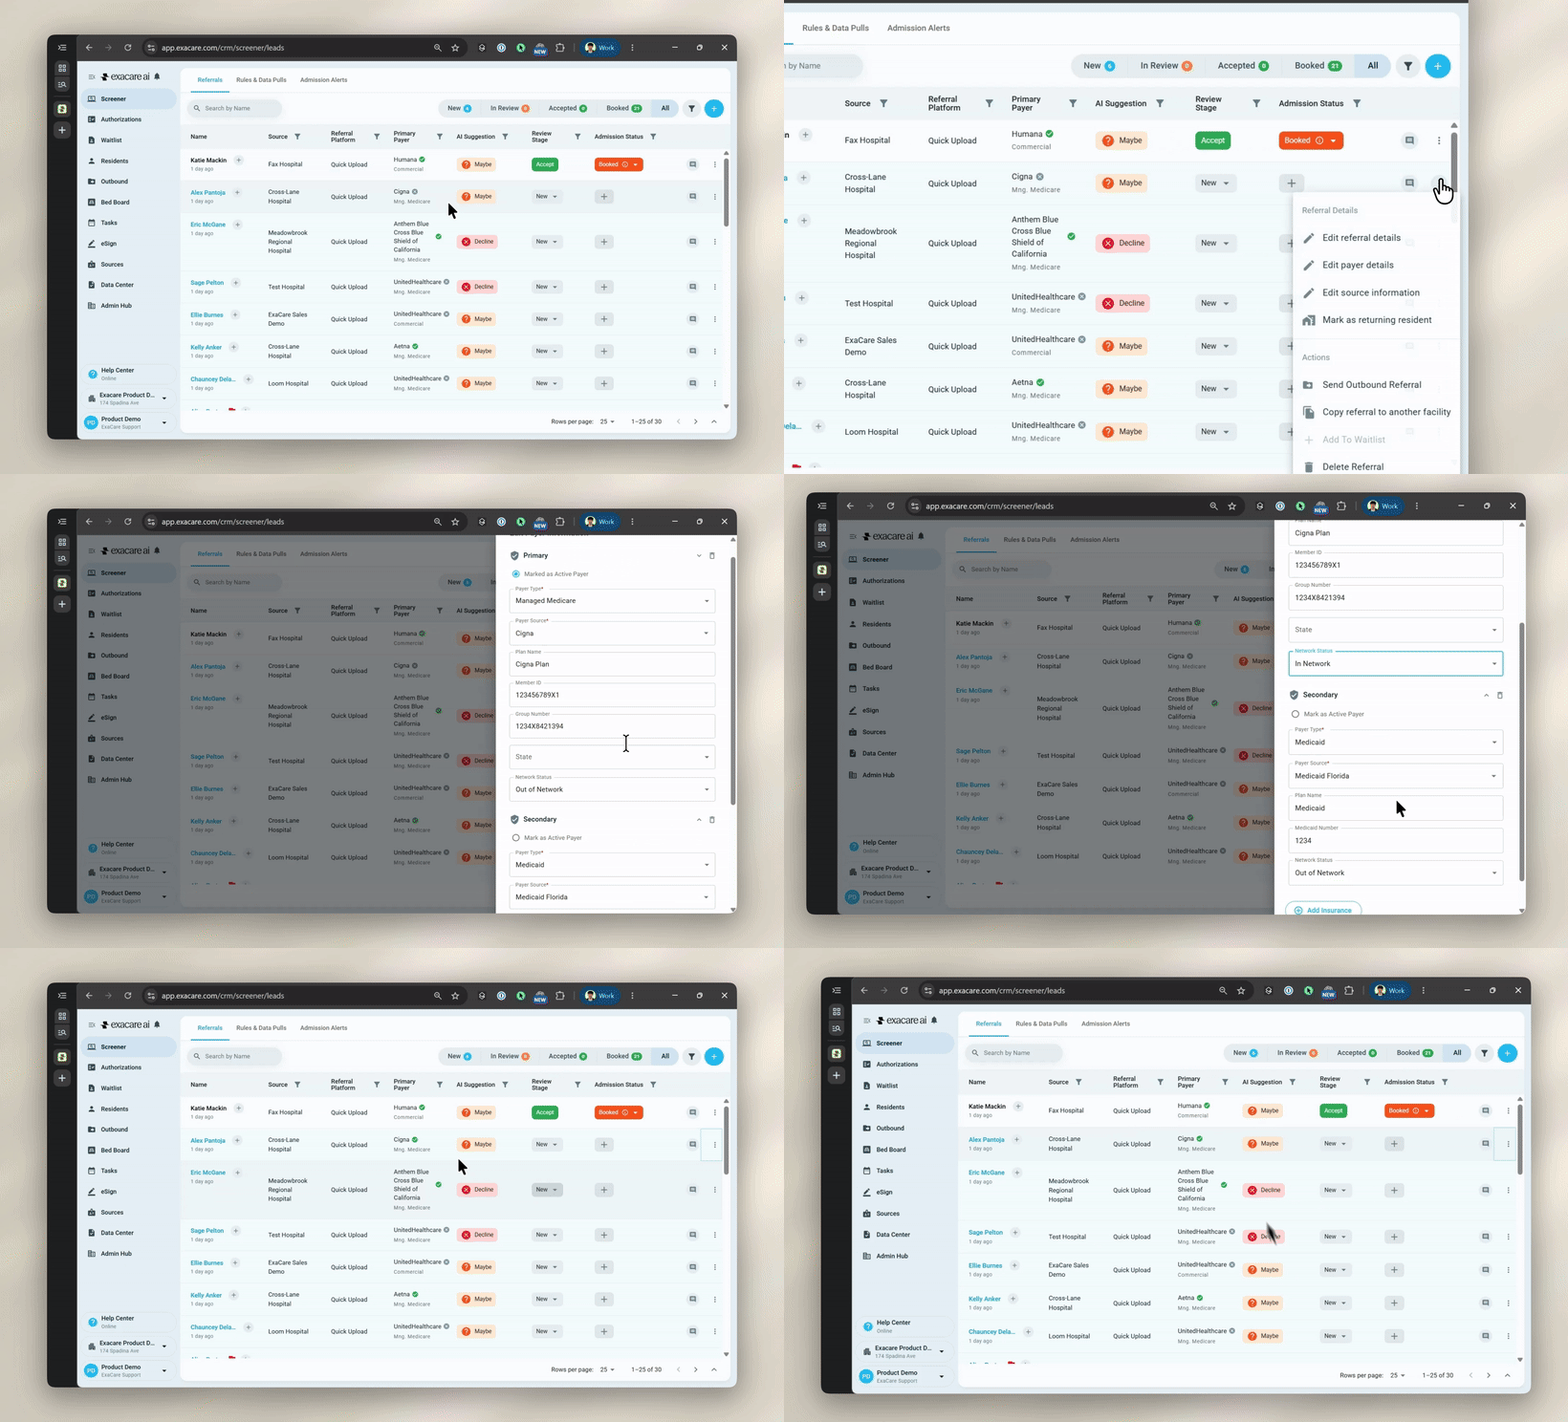
From a lead's facesheet:
Scroll to Insurance Information
Select the pencil icon that says Edit
Change Network Status to either In Network, Out of Network, or Undetermined
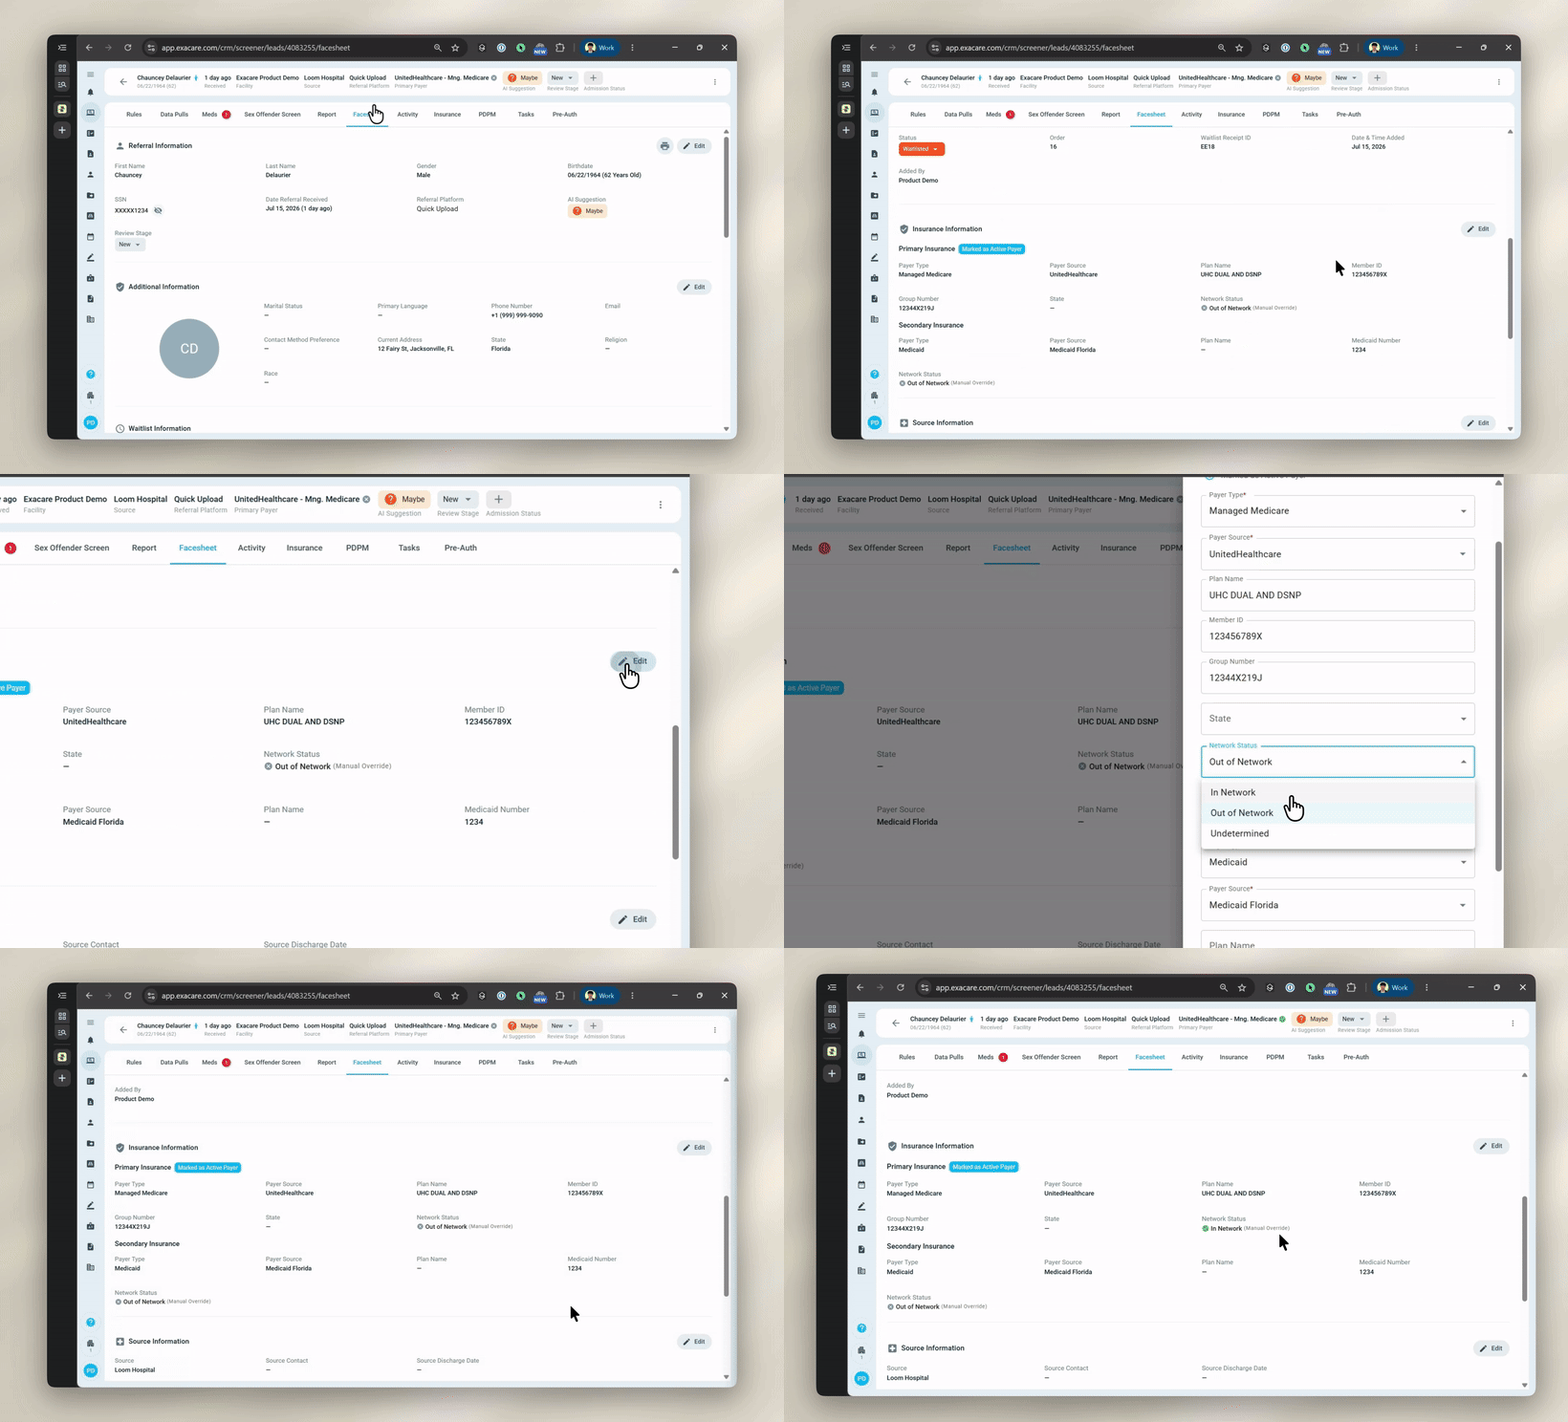
Overrides apply to that specific referral only. They do not change the payer’s default status in the Payer List.